
Okay, okay, there are a million things to learn and a ton to discuss but I’m going to take this complicated art and break it down into three main things with lots of photo examples. I’m pretty sure everyone who has ever taken a photo, looked at Instagram, and seen great photos wishes they could take better photos. Here’s a few things to consider that I guarantee will help make your next photo a better one.
STEP 1: GET THE RIGHT EQUIPMENT
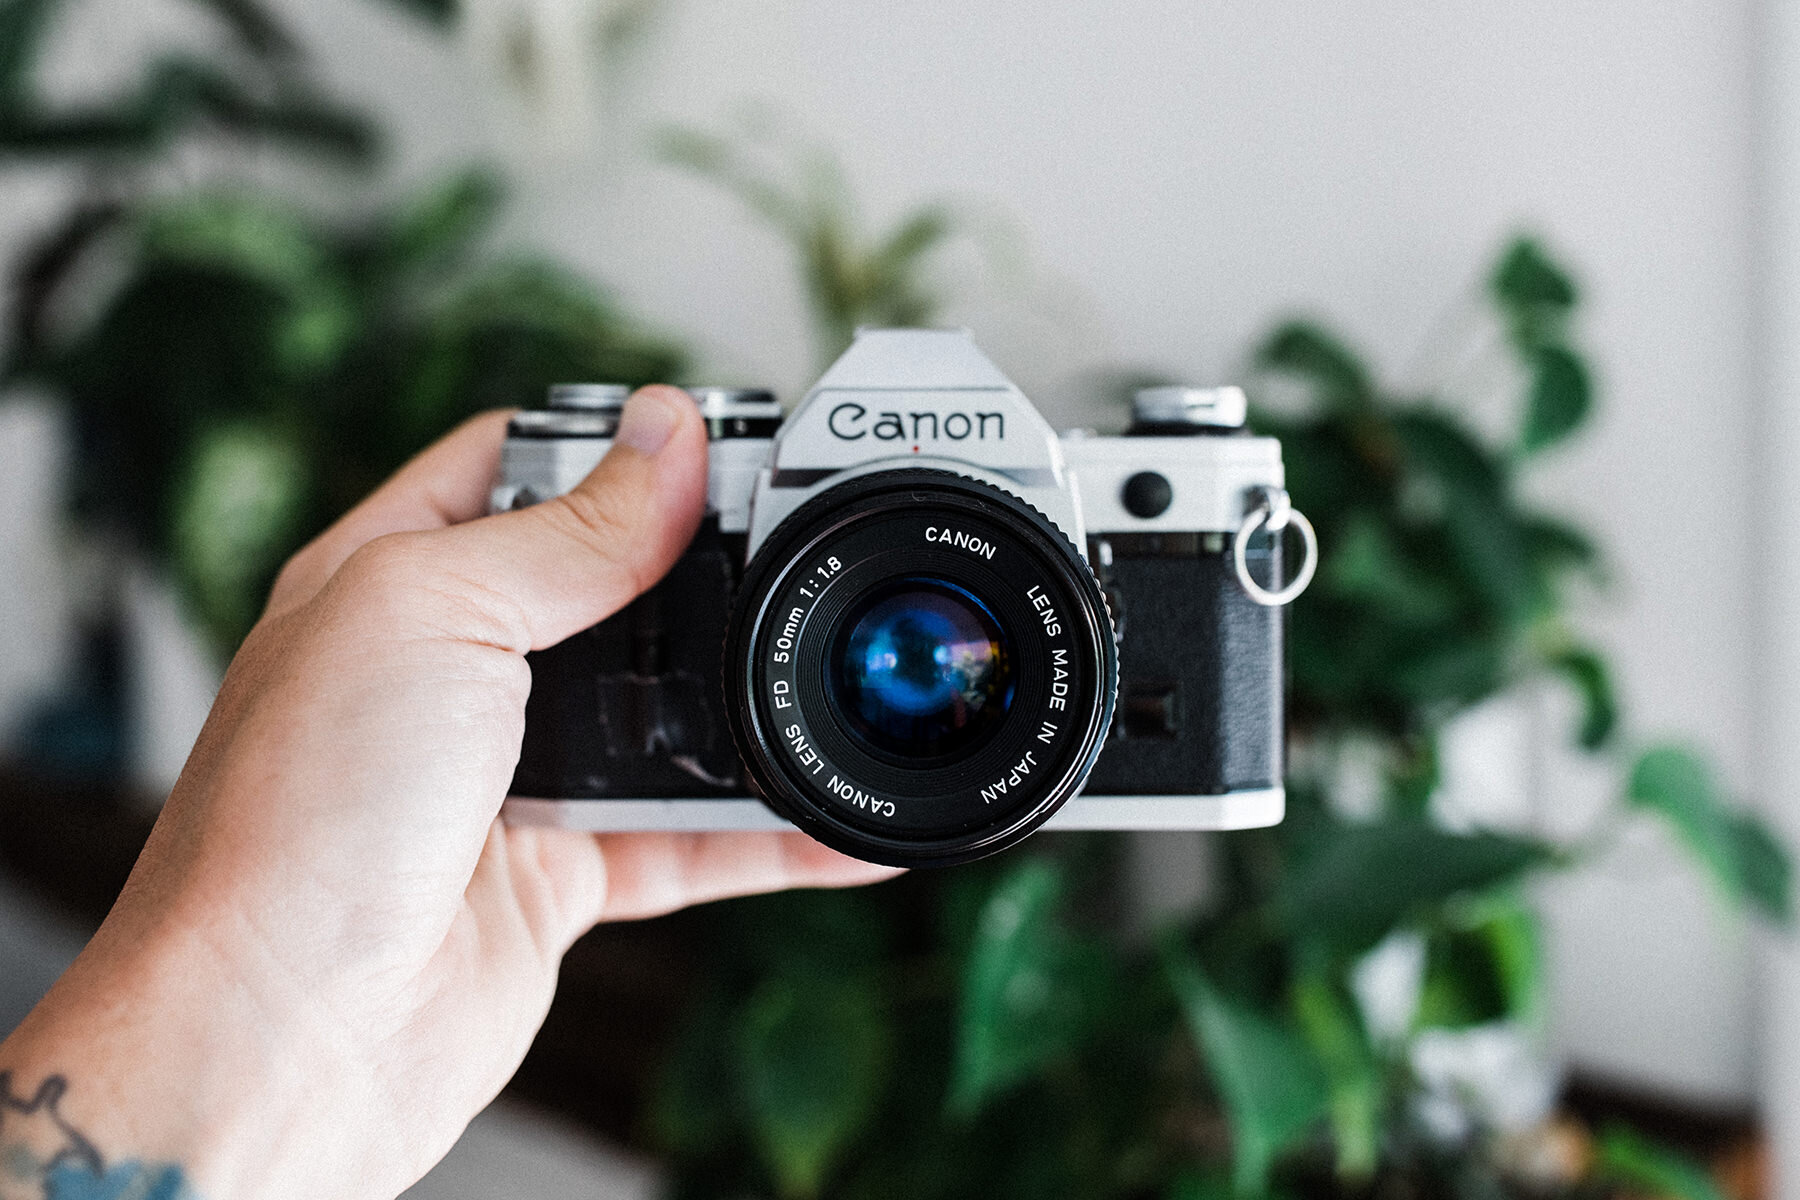
Take $5,000 and purchase… JK. The common photographer joke is when you take a good photo, people say, “wow, that’s such a nice camera”, like our skill has nothing to do with it. With these tips, you’ll learn some skills to take better photos with whatever camera you use. For most people, their camera is their iPhone. That’s okay. They say the best camera is the one you have on you.
A few more expensive options for you:
Shoot film. Film doesn’t need editing if you go to a good lab. The bummer is it’s expensive. The good thing is, because you can’t see the photo immediately, you take the photo and move on, allowing you to spend more time focusing on the moment you’re enjoying. They’re also typically lighter than digital cameras. If you want to get into film here are a few recs for you:
Disposable Camera (bad lens but cheap option) - Black & White Film, Color Film
Point and shoot film camera (Olympus Mju-2, Canon AF35mm, etc) - Shop KEH for reliable used cameras
If you’re not in to film, that’s chill. We’re just in this weird spot in photography where your iphone is better than most beginner cameras. Meaning unless you’re ready to fork over $1,000+ you should probably just use your iphone. I’m sure I’ll get lots of hate for this comment, but so be it. Hahaha. If you want to spend $1,000-$1,500, here are a few good options:
Fuji X100V (hard to find right now because people are loving these. They have a fixed lens which means you don’t get sucked in to buying a bunch of different lenses, and come with film recipes to edit your photos immediately to look like film, again so you don’t need to waste your life away on the computer.
All these are great size for traveling, lightweight and super beautiful for colors and sharpness.
Okay, now that' we’re through the gear, let’s discuss how to actually take some good photos.
Step 2: FIND Good Light
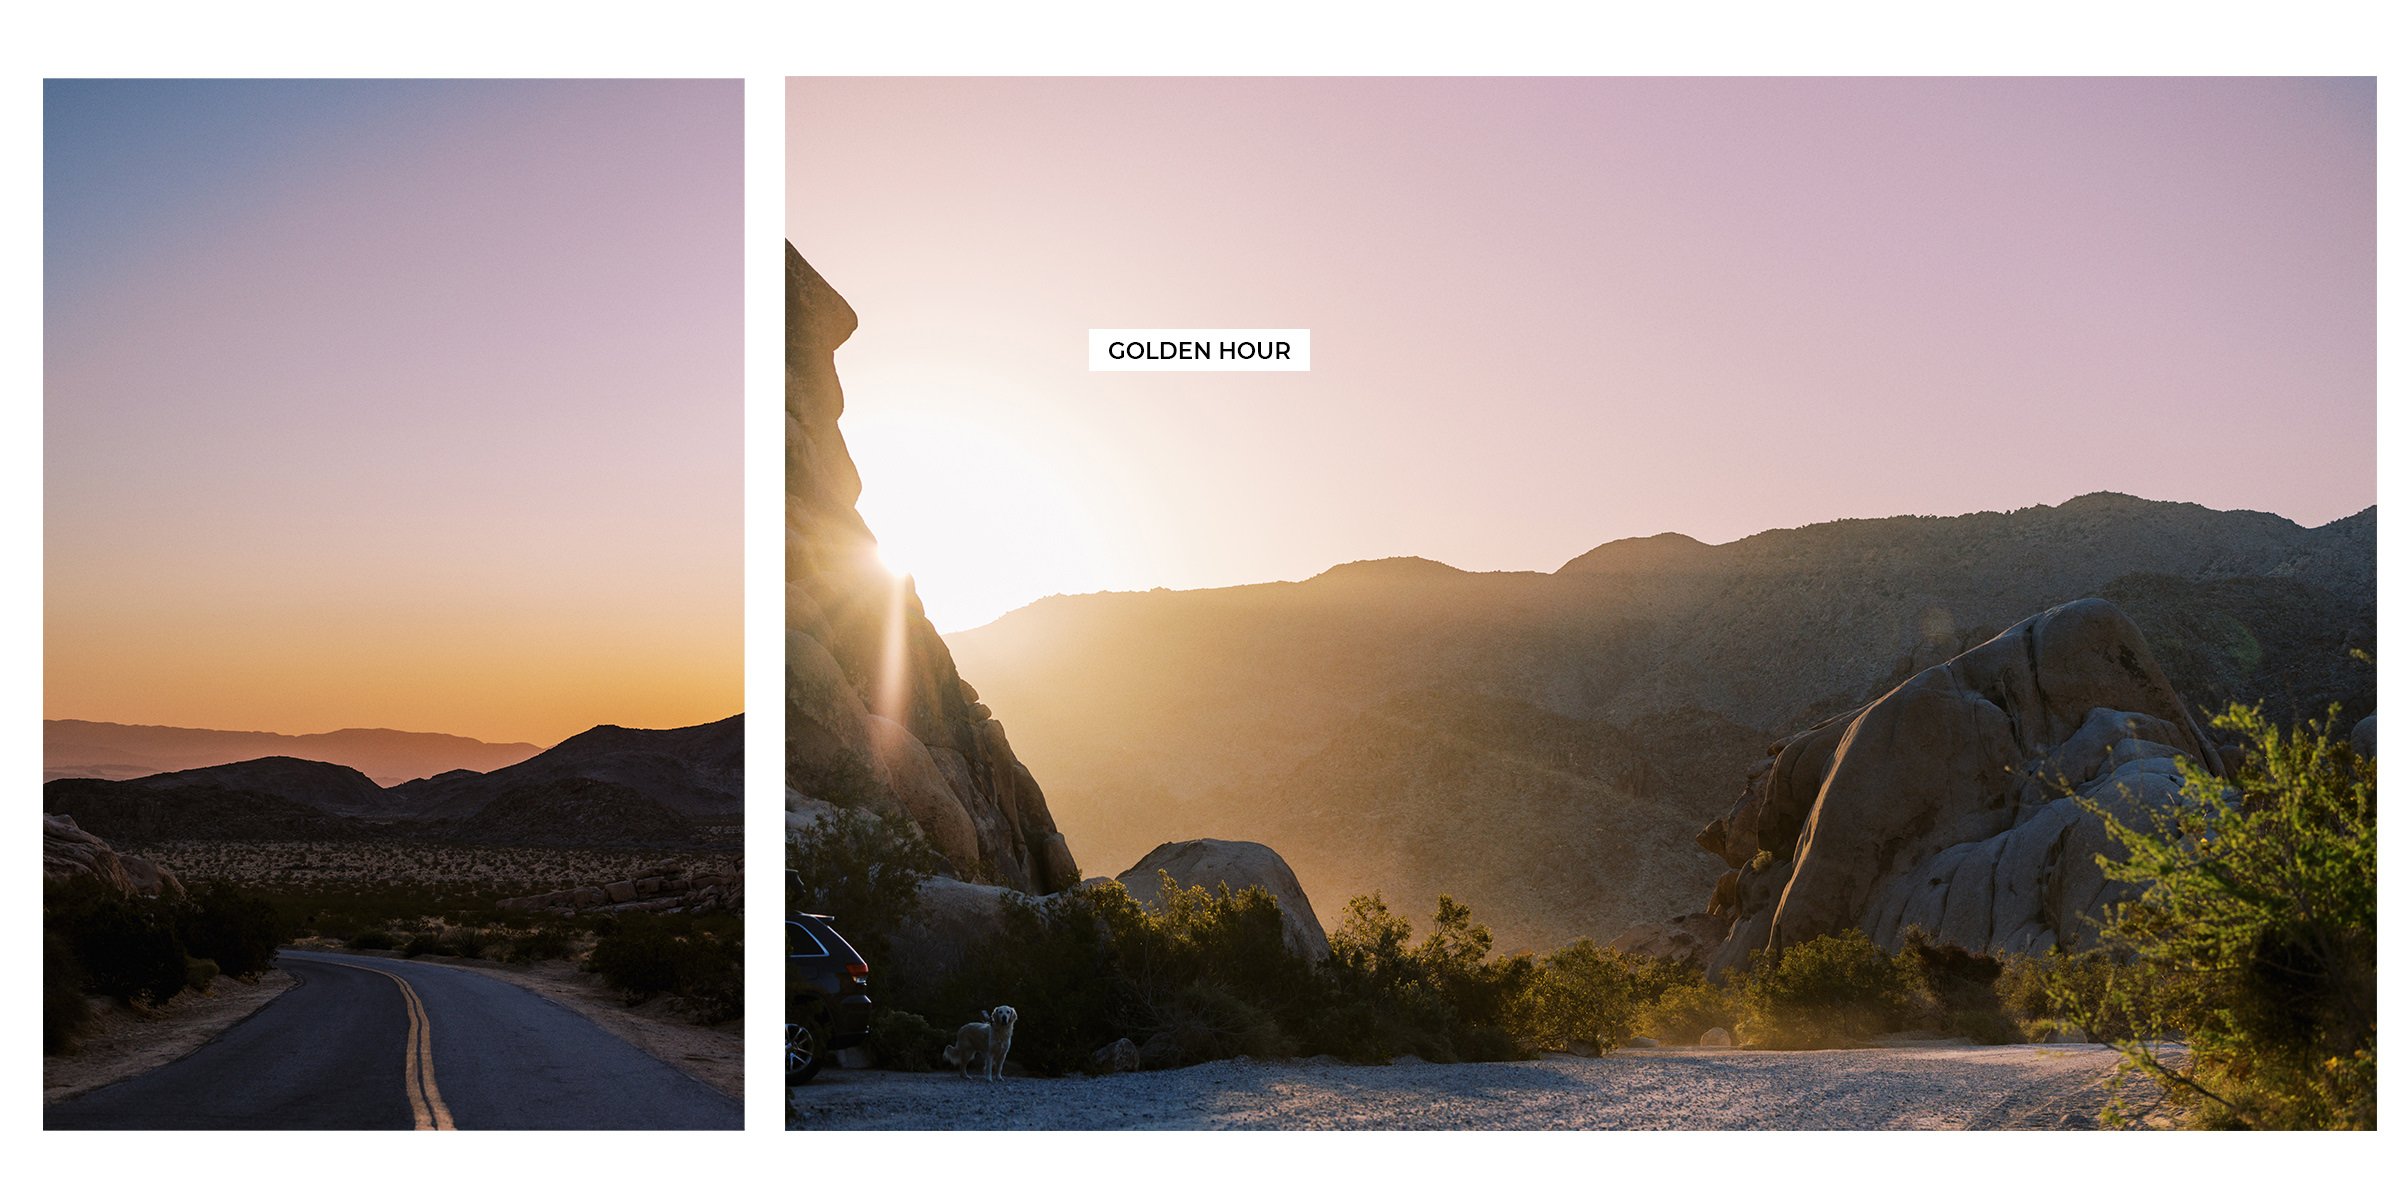
Sunrise at Joshua Tree
If you’ve ever shot a photo at golden hour (the hour right after sunrise, or the hour right before sunset) you’ve probably been amazed at how nice the photo looks. This isn’t luck. Golden hour is when the sun is low and makes it much softer on everything it touches. It evens out the brightest spots and the darkest shadows and makes it a lot easier to take a good photo. The sky doesn’t wash out (turn white) and people and landscapes don’t have crazy harsh shadows on them. This is the easiest time to take a good photo.
When I’m traveling somewhere I always try and catch sunrise and sunset. If I have a chance I like to plan out some scenes or spots I want to be at during those times. As soon as I wake up, I skip the coffee and the morning brush and run straight to take some photos. Those other things can wait 15-20 mins.
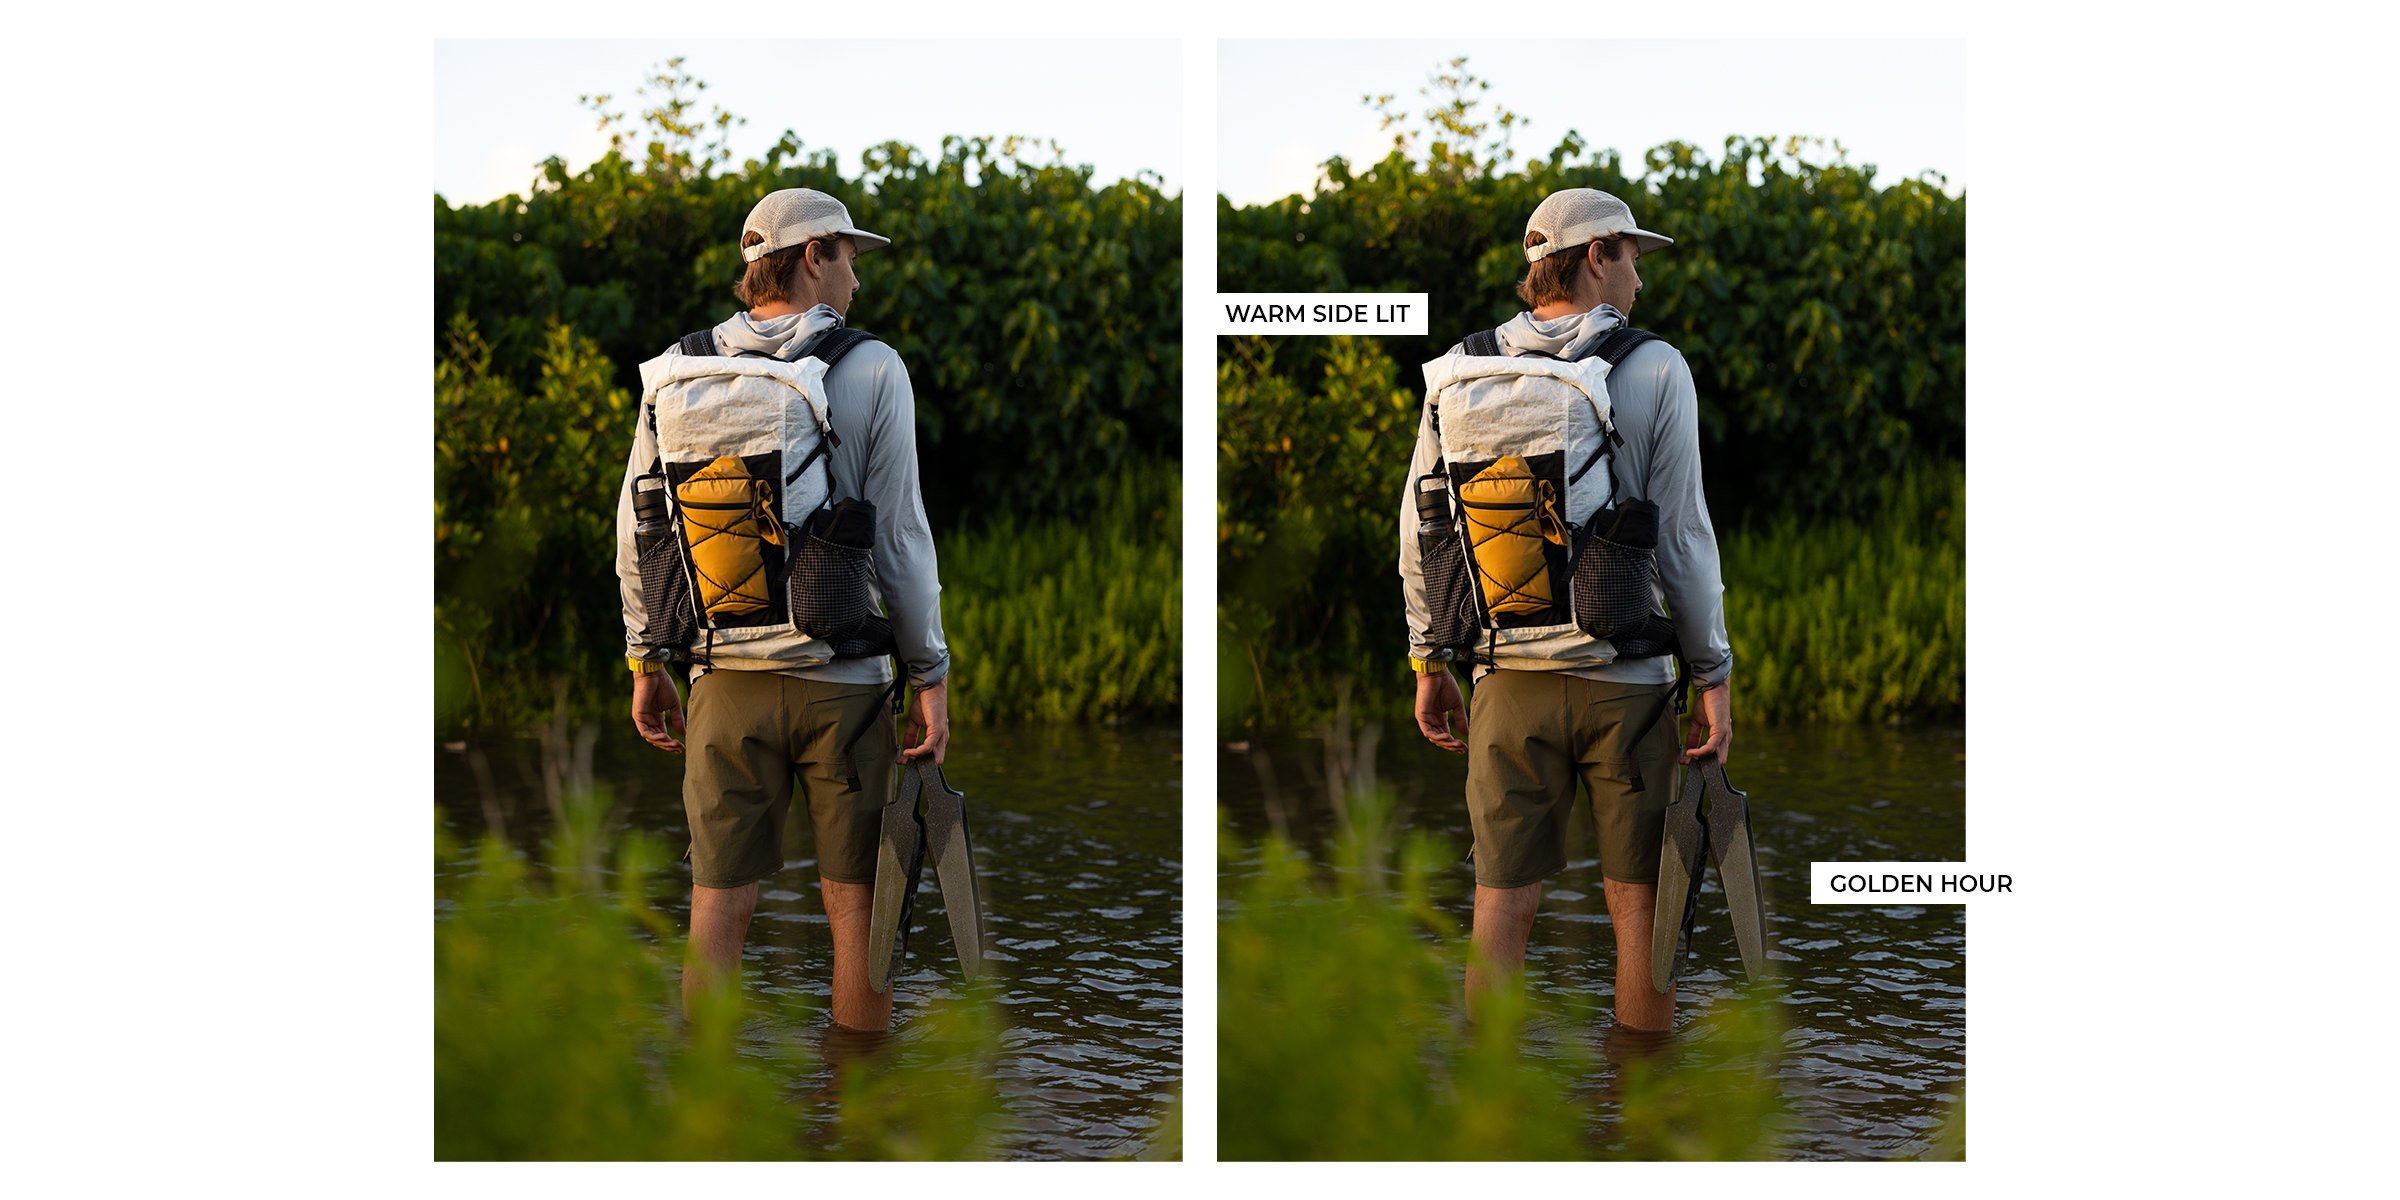
Golden hour makes for easy beautiful portraits
So what about the other 22 hours in a day? Well you can definitely take photos but you need to get more creative. If it’s overcast, the clouds work as a big softbox making it easier to take photos with even lighting, but not always super interesting light.
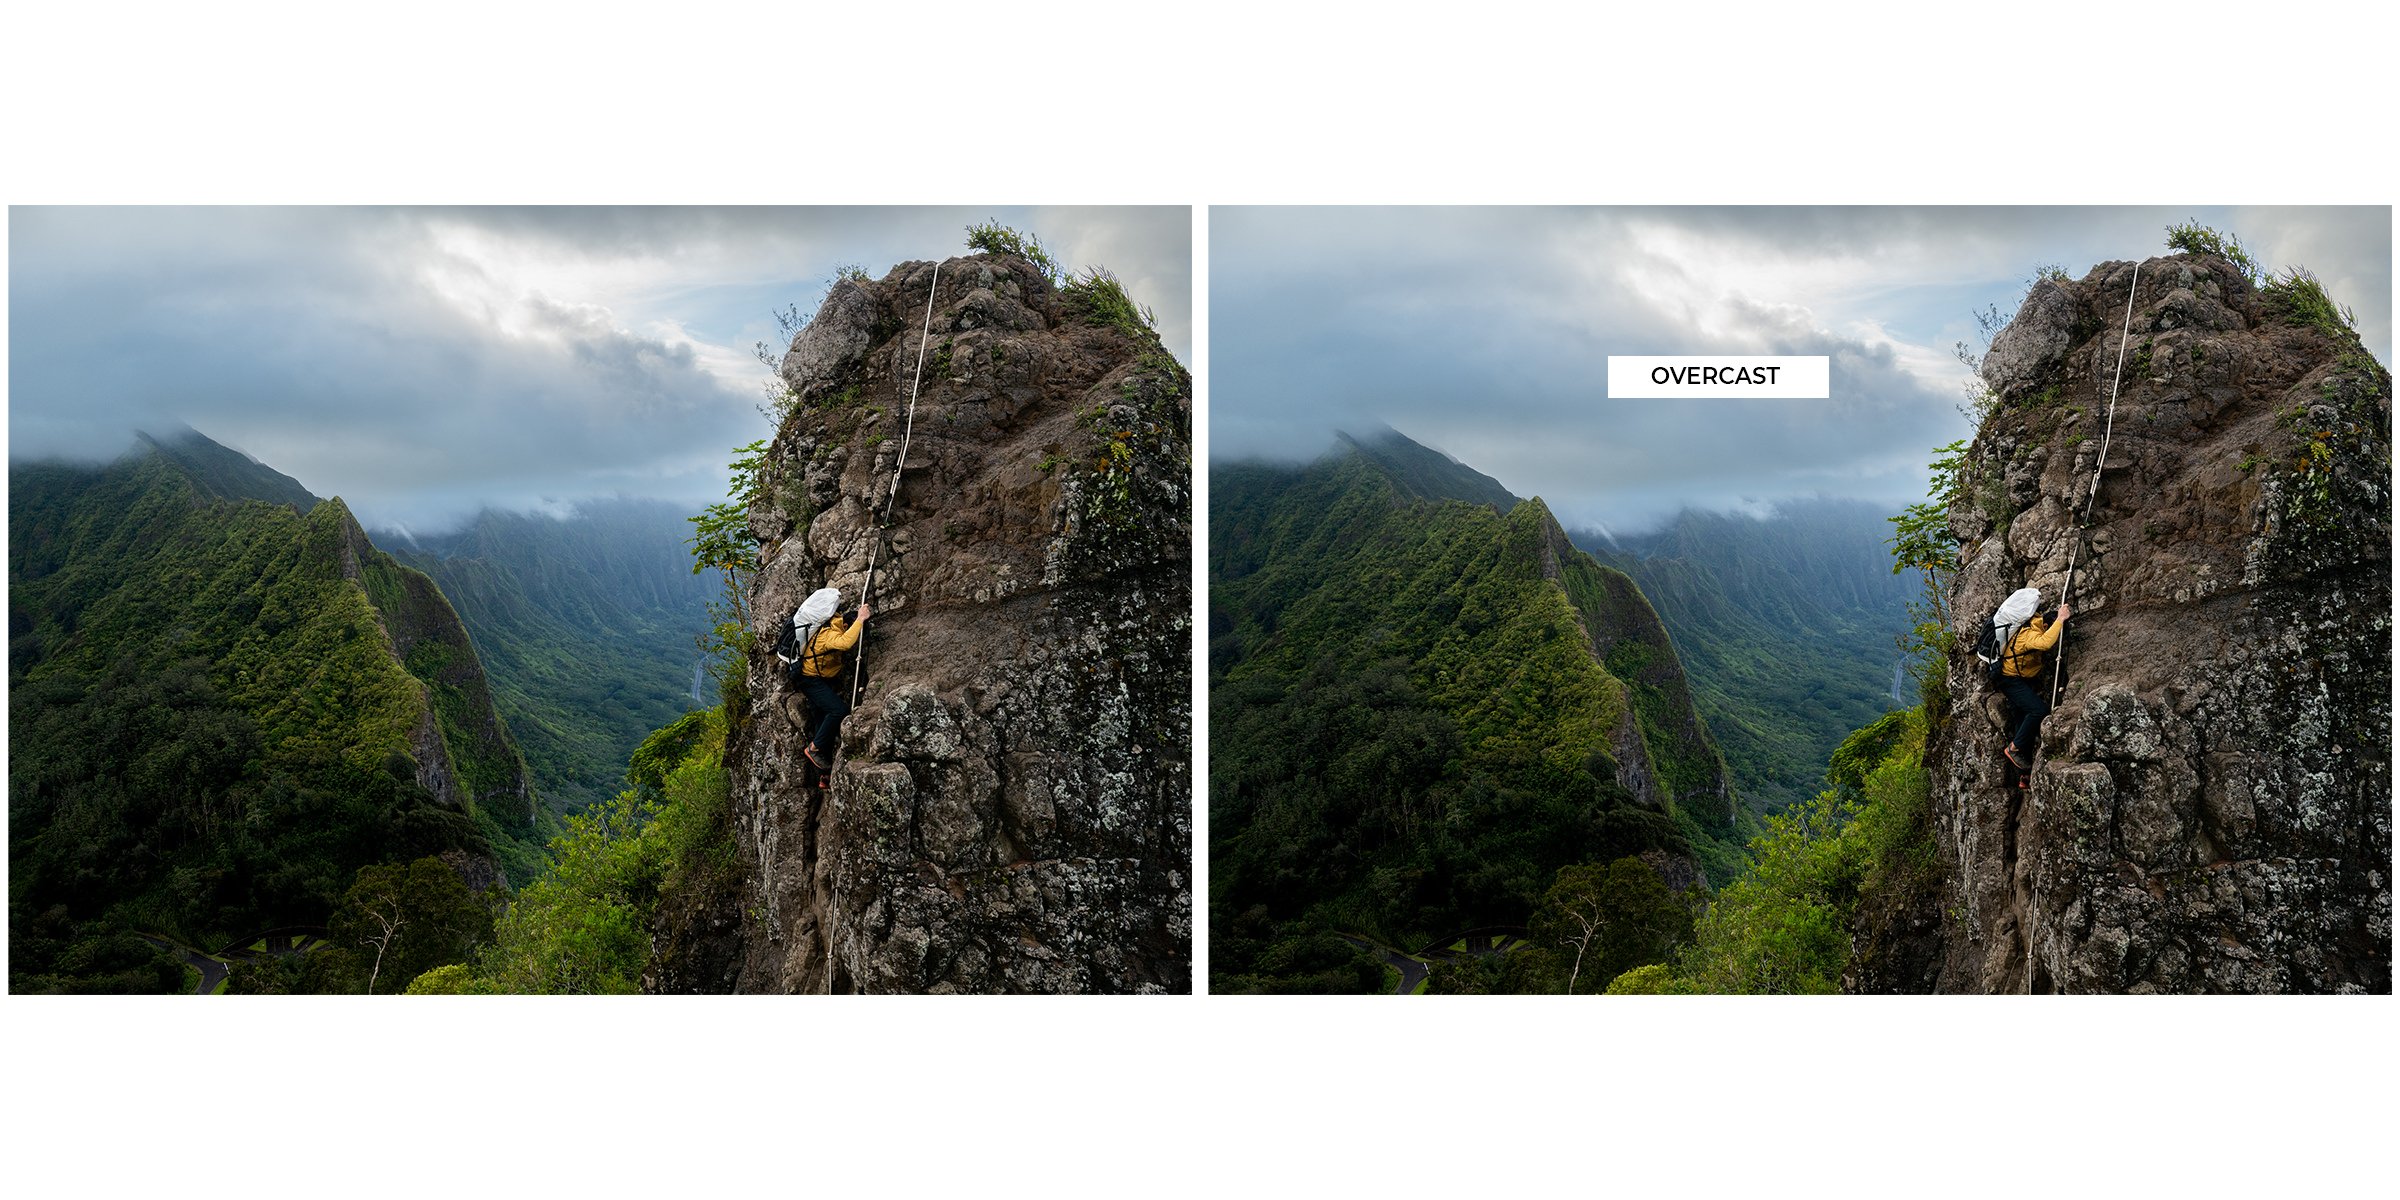
Using the overcast skies to our advantage in the Koolau Mountain Range on Oahu.
If you have harsh light, work with the shade, caves, trees, etc. to try and make the light as interesting as possible without just being a bright wide open shot.
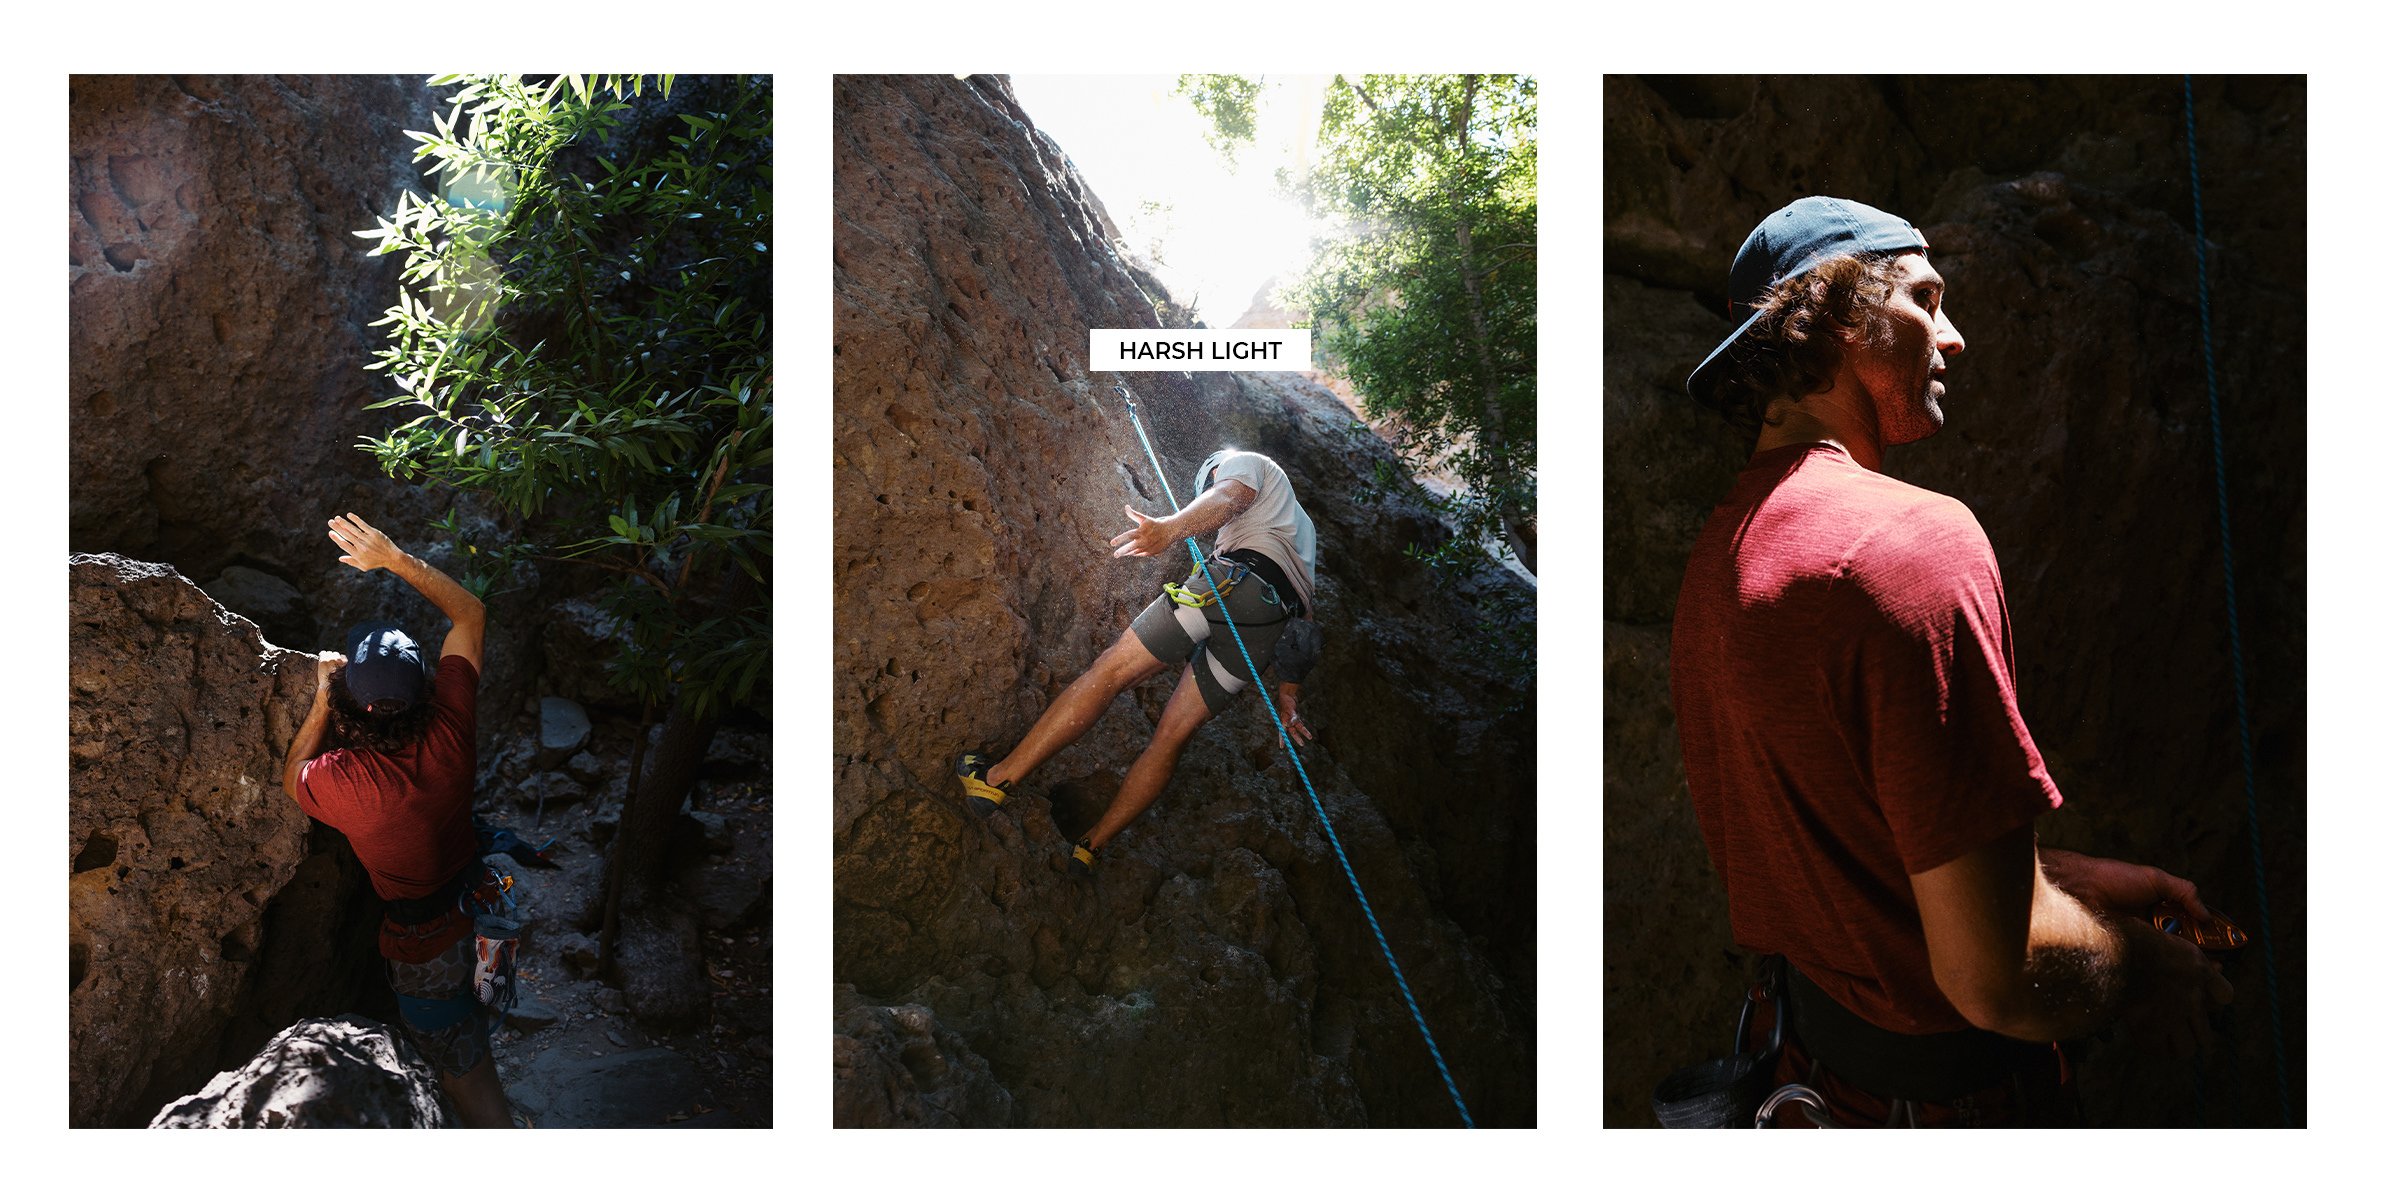
Working with the harsh light climbing in Malibu.
STEP 3: COMPOSE YOUR SCENE
Composition. Okay, this is kind of a big word. It basically just means how you arrange the things in your photo. It’s far too easy for people to say, oh I like this, pull out their camera and take a photo. Fine. But if you want to take a good photo, sometimes you need to move your feet, get high, get low, rearrange people, etc. Actually think about the scene. What do you and don’t you want in it? Now compose your photograph. There are quite a few tricks for what to think about with composition. Here are just a few that I love:
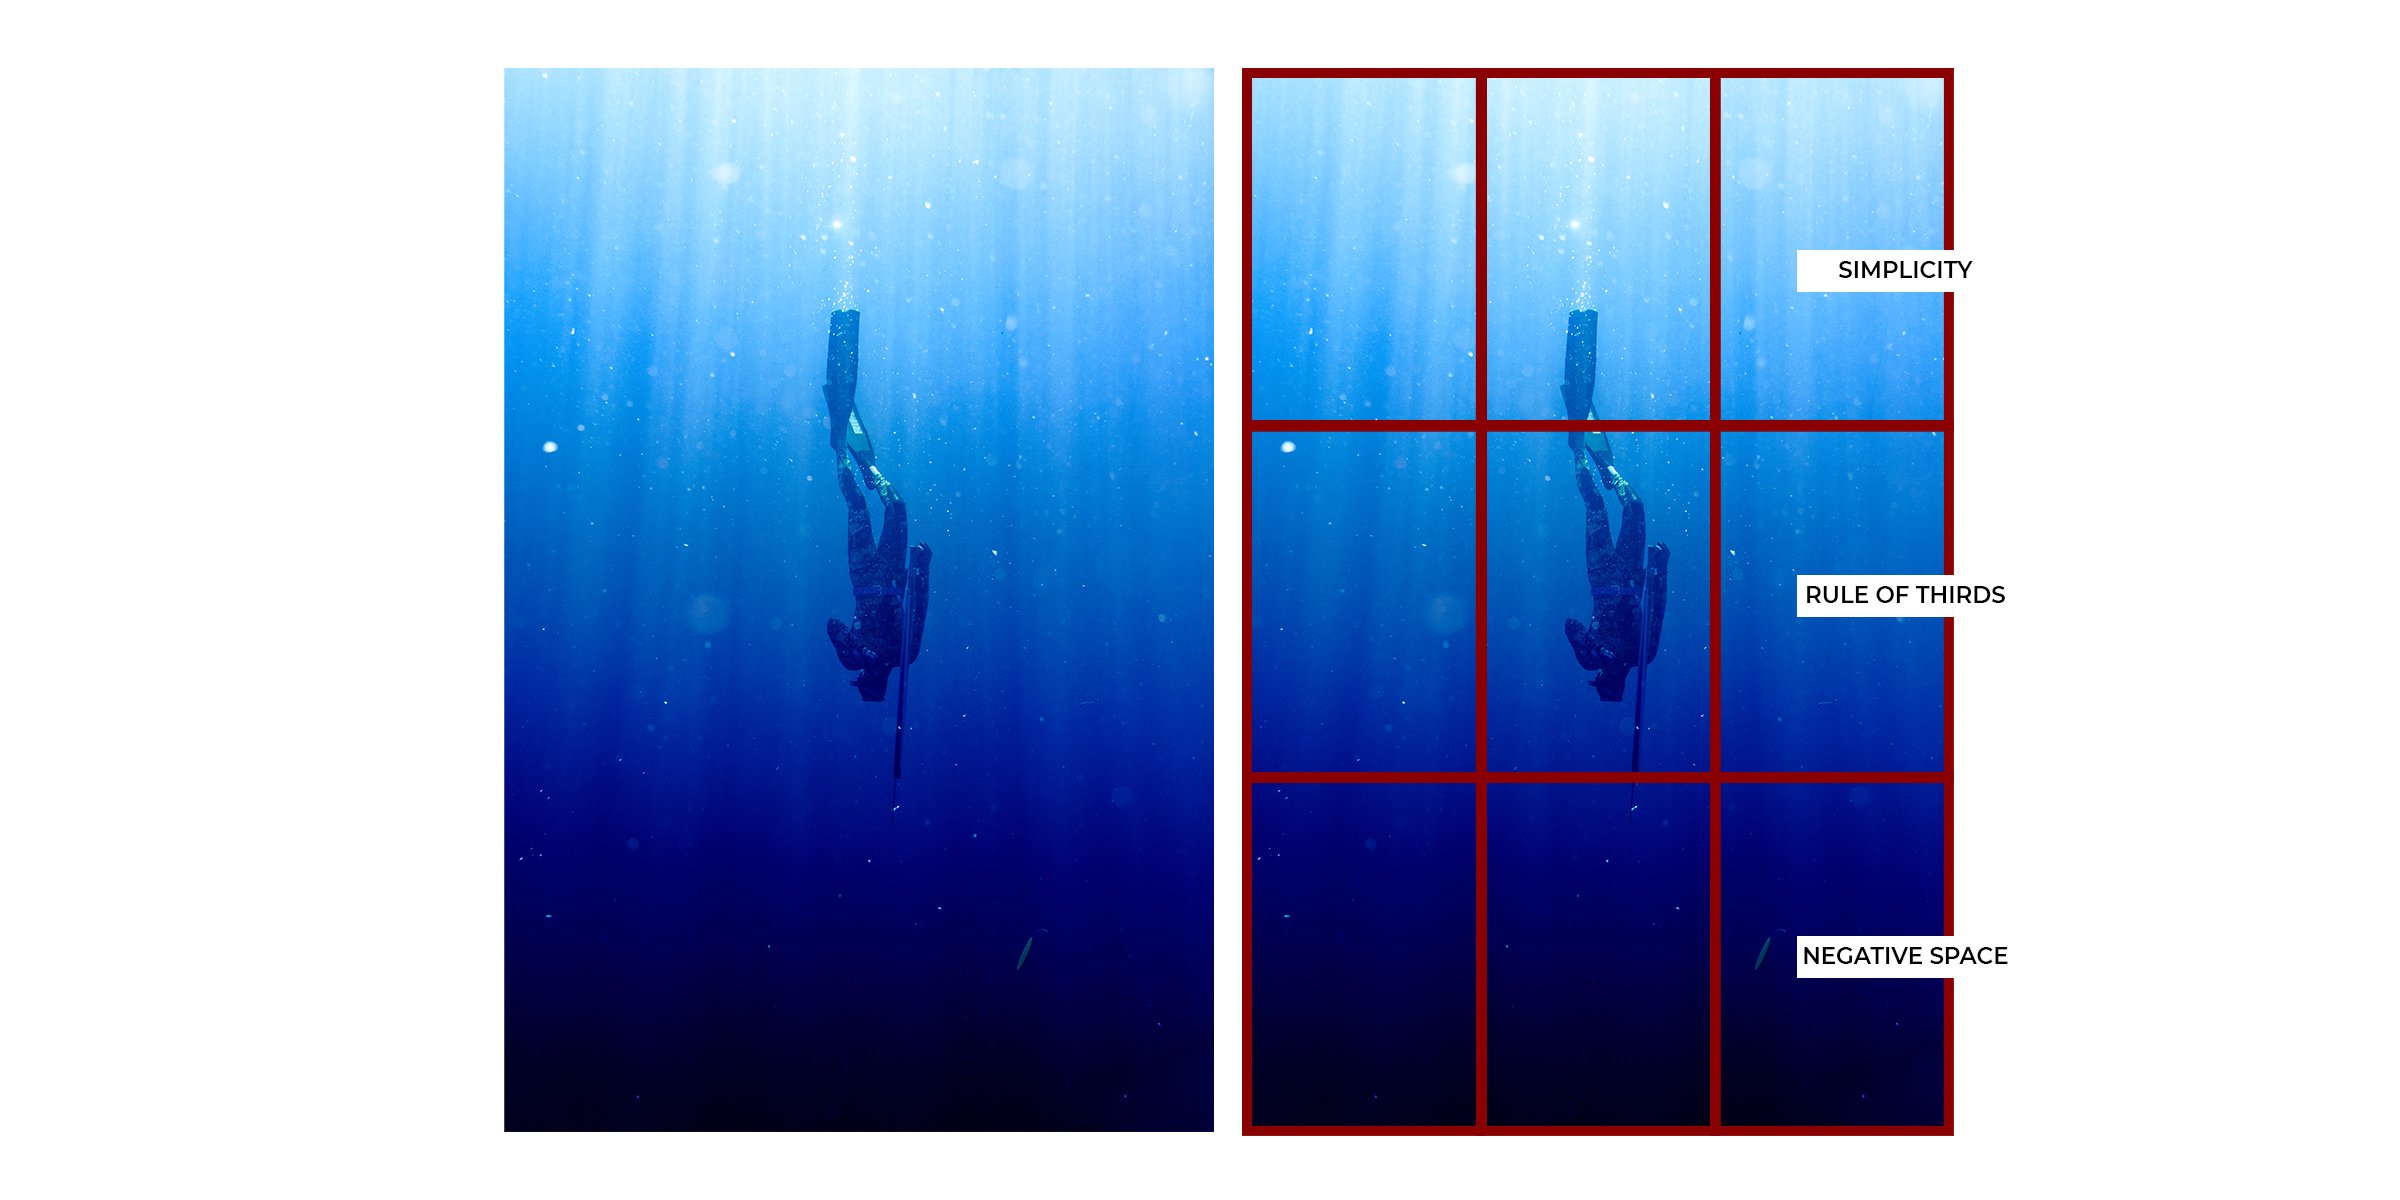
SIMPLICITY
First and foremost, simplify your photo. People tend to not think about the background or what else is in the photo. Take a second and try and make your subject stand out and your frame simpler. To make your subject pop off the background, you can use color contrast, distance from the background, and simplifying your background (meaning get them to stand in front of something less busy to the eye).
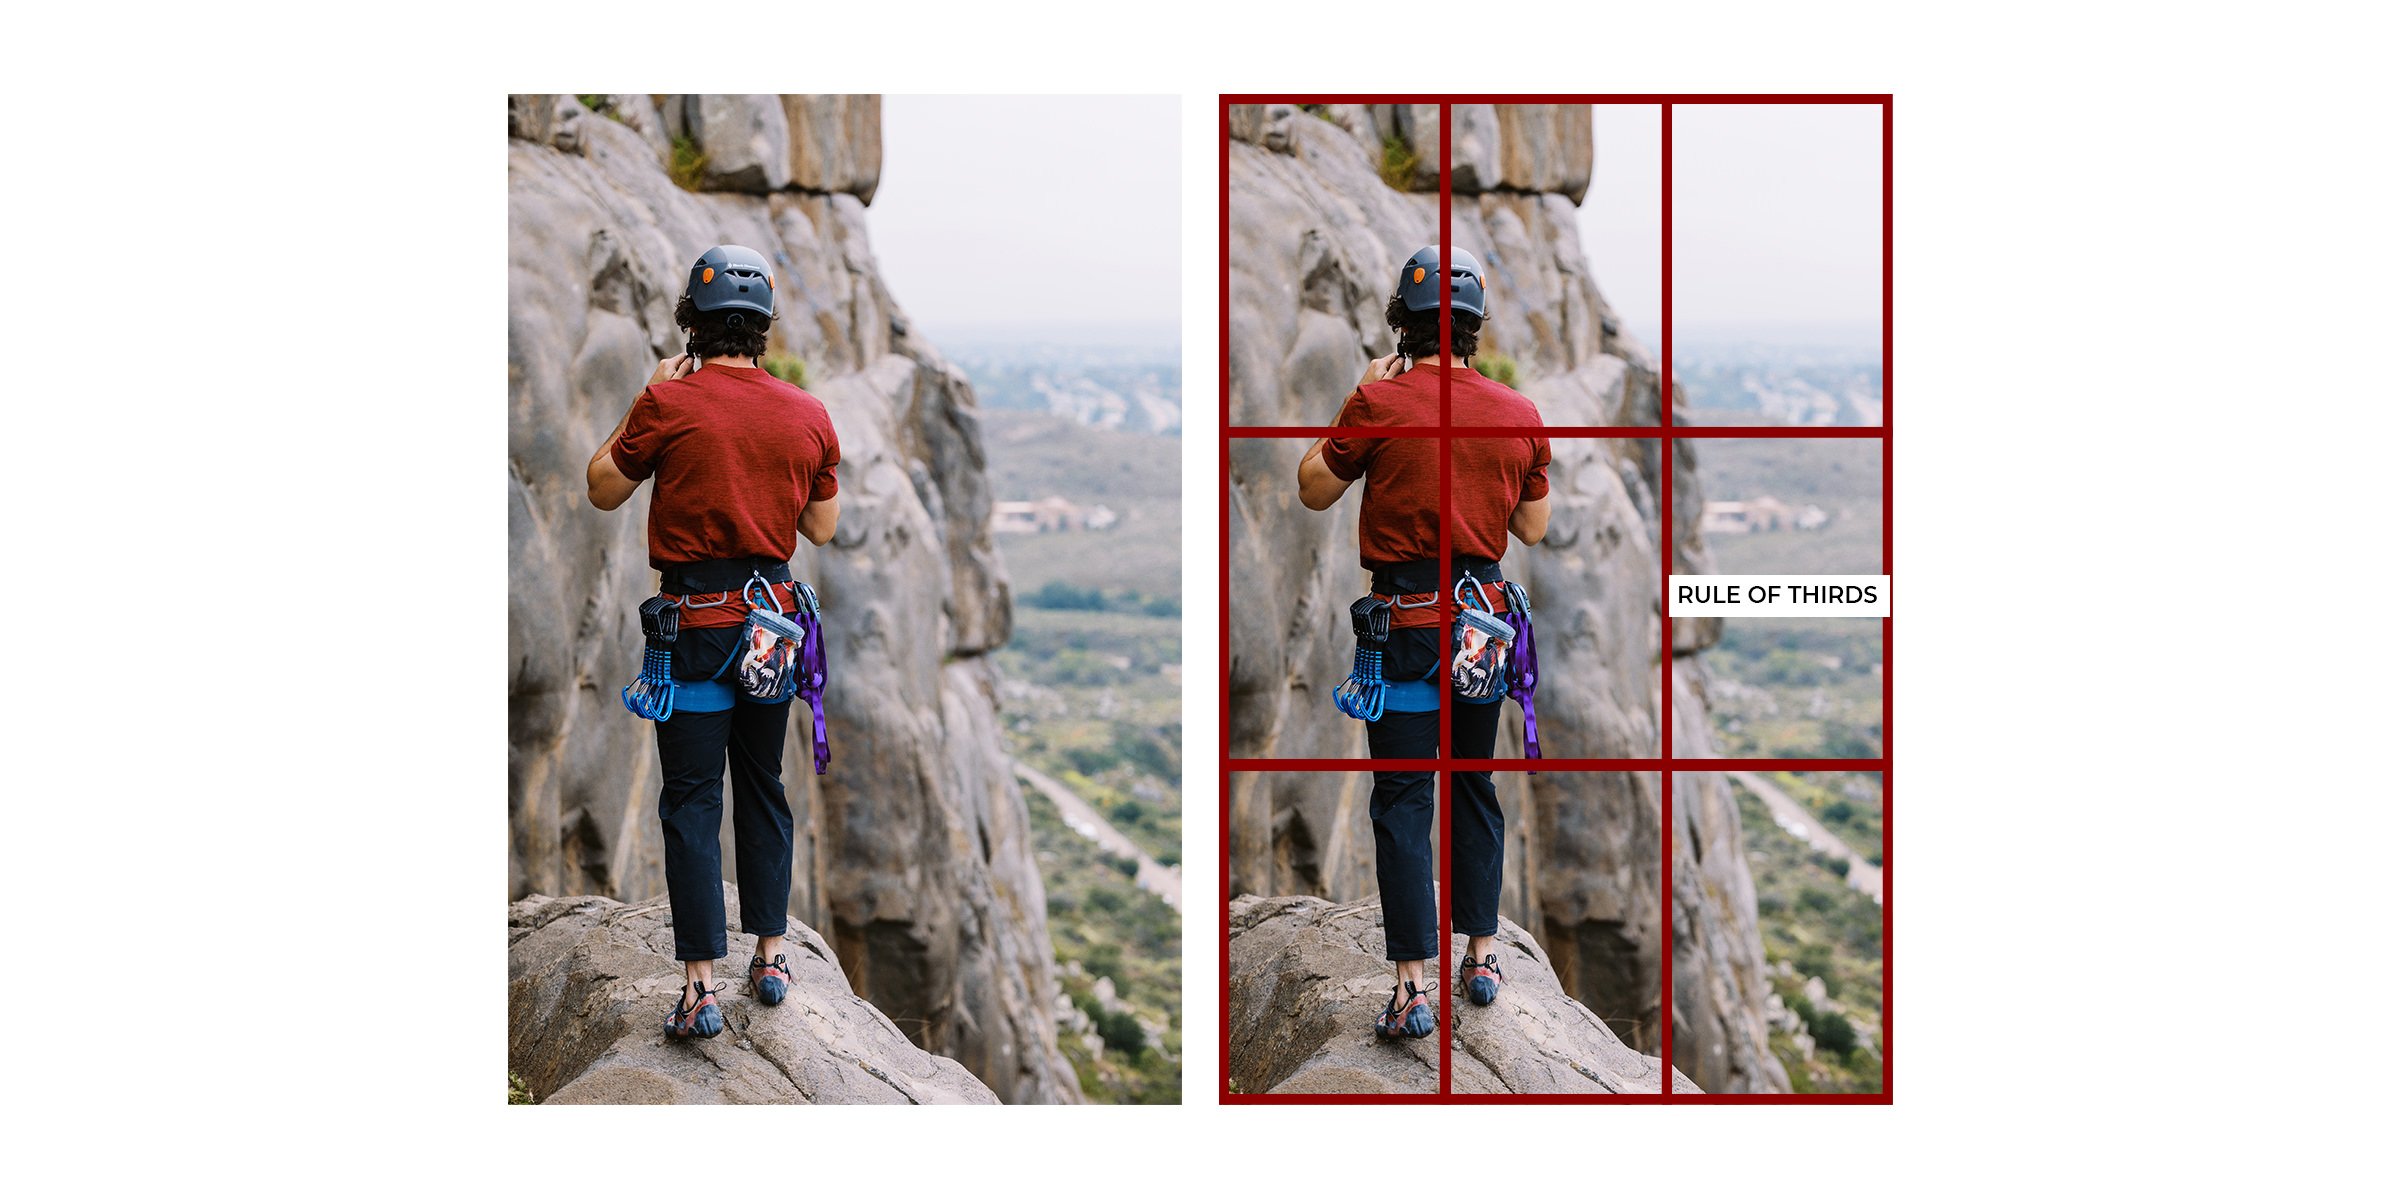
RULE OF THIRDS
You can break up a photo into 9 squares, the rule of thirds. Three lines vertically and three lines horizontally. Typically people just center their subject and that’s it. Think about positioning your subject somewhere else besides the center every time and adding some more interest to your photo. In the photo of Vinny above I was able to place him on the first vertical line, the center is the rock, and the right is the land in the background giving the scene much more scale and interest to the photo.
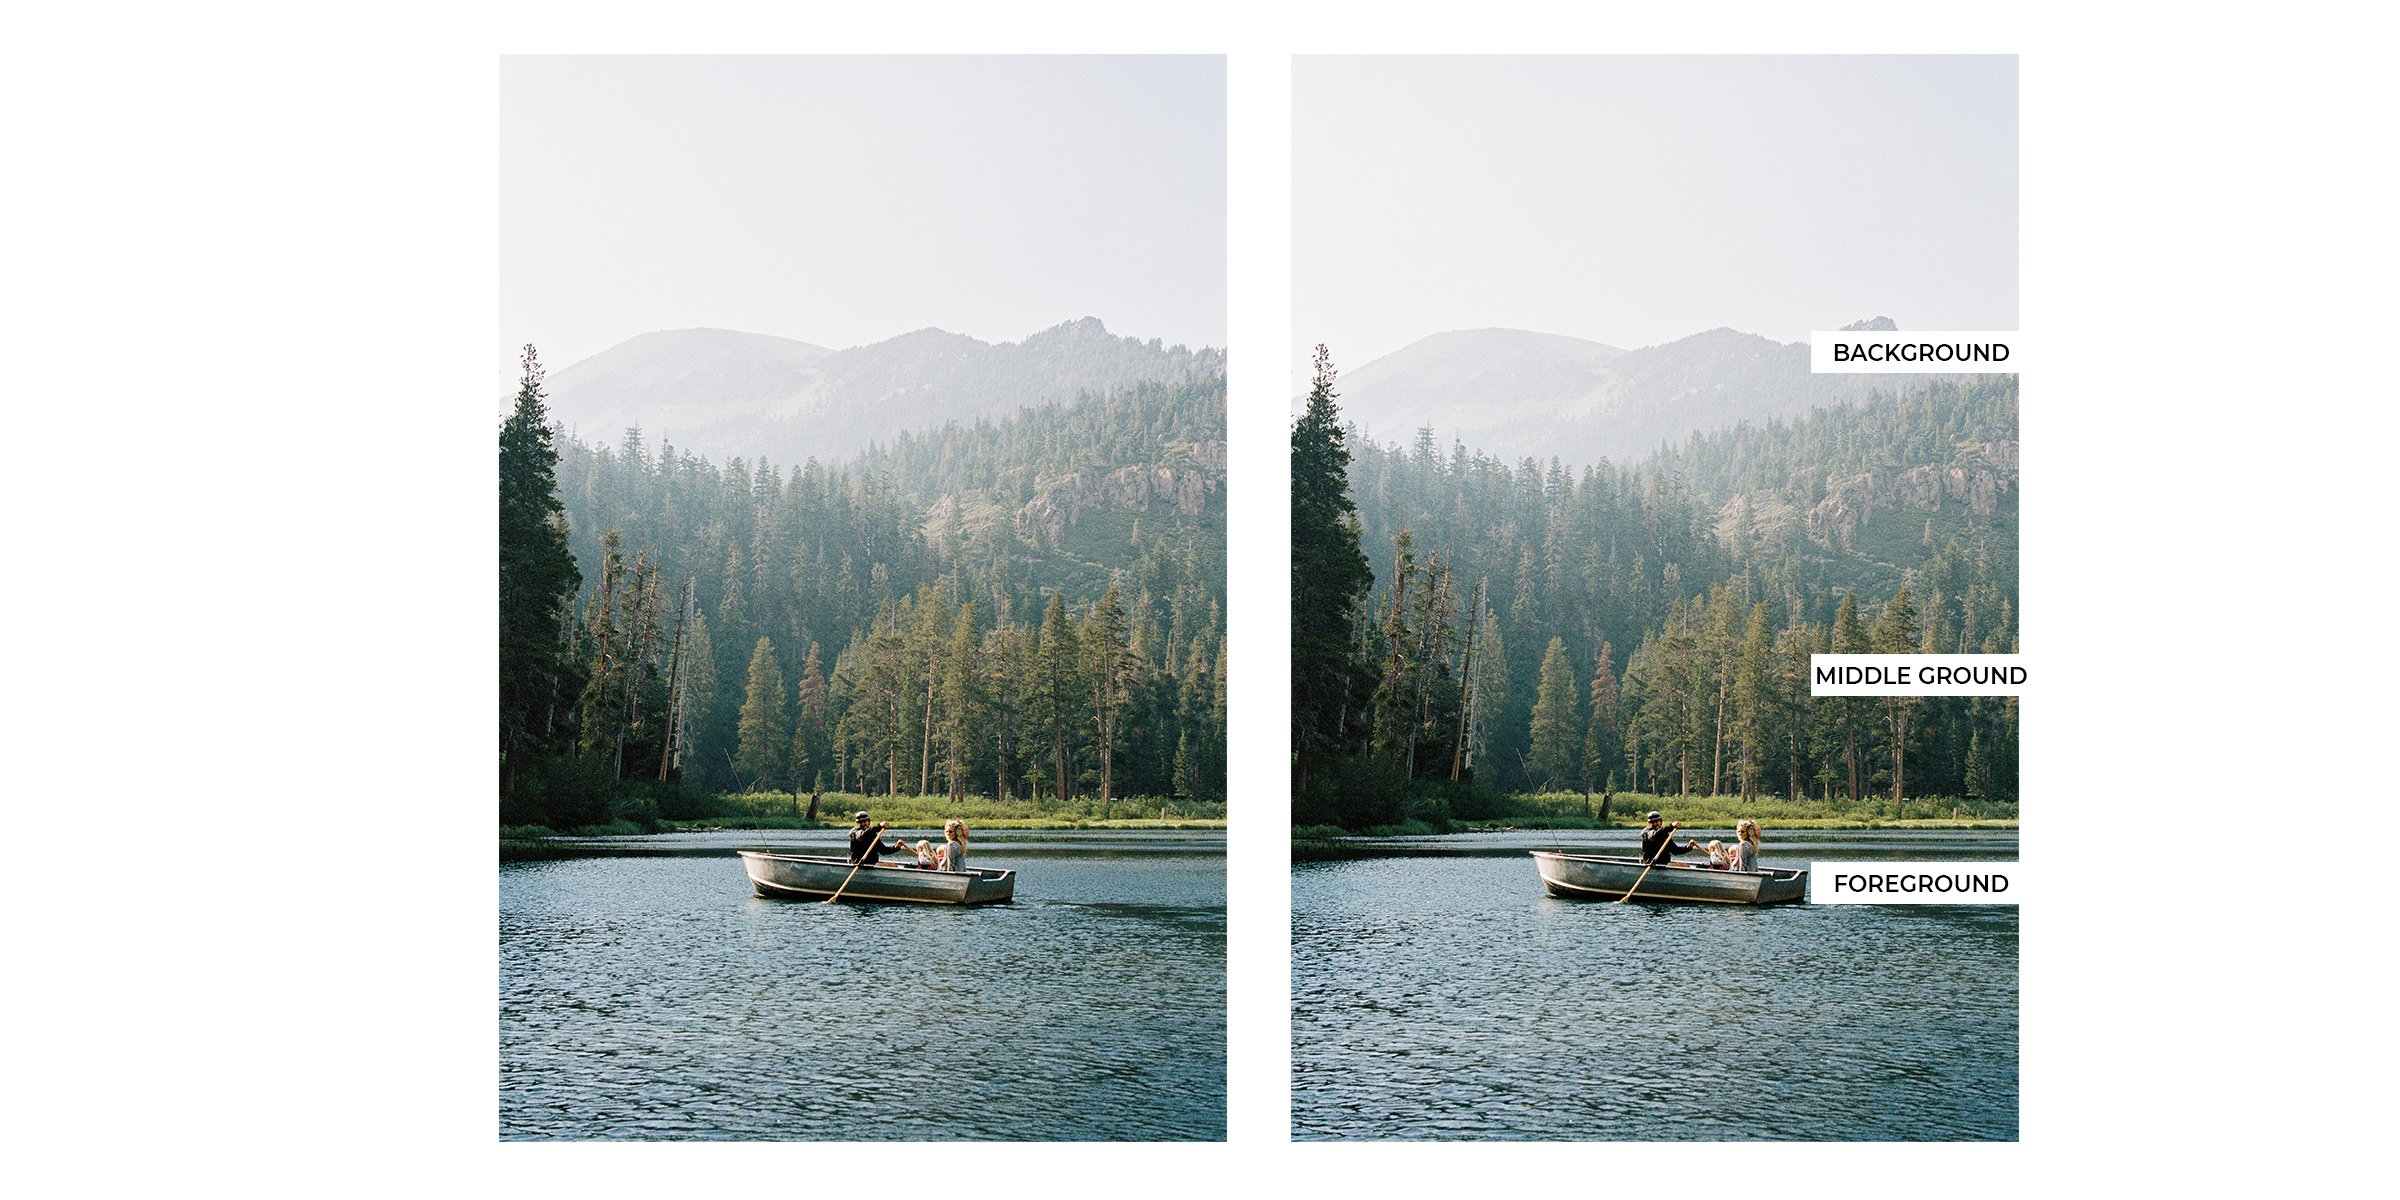
FOREGROUND, MIDDLE GROUND & BACKGROUND
Along the lines of the rule of thirds (pun intended), you have your foreground, middle ground and background. Having something of interest in each that works in unison with each other will make for a much more interesting photograph.
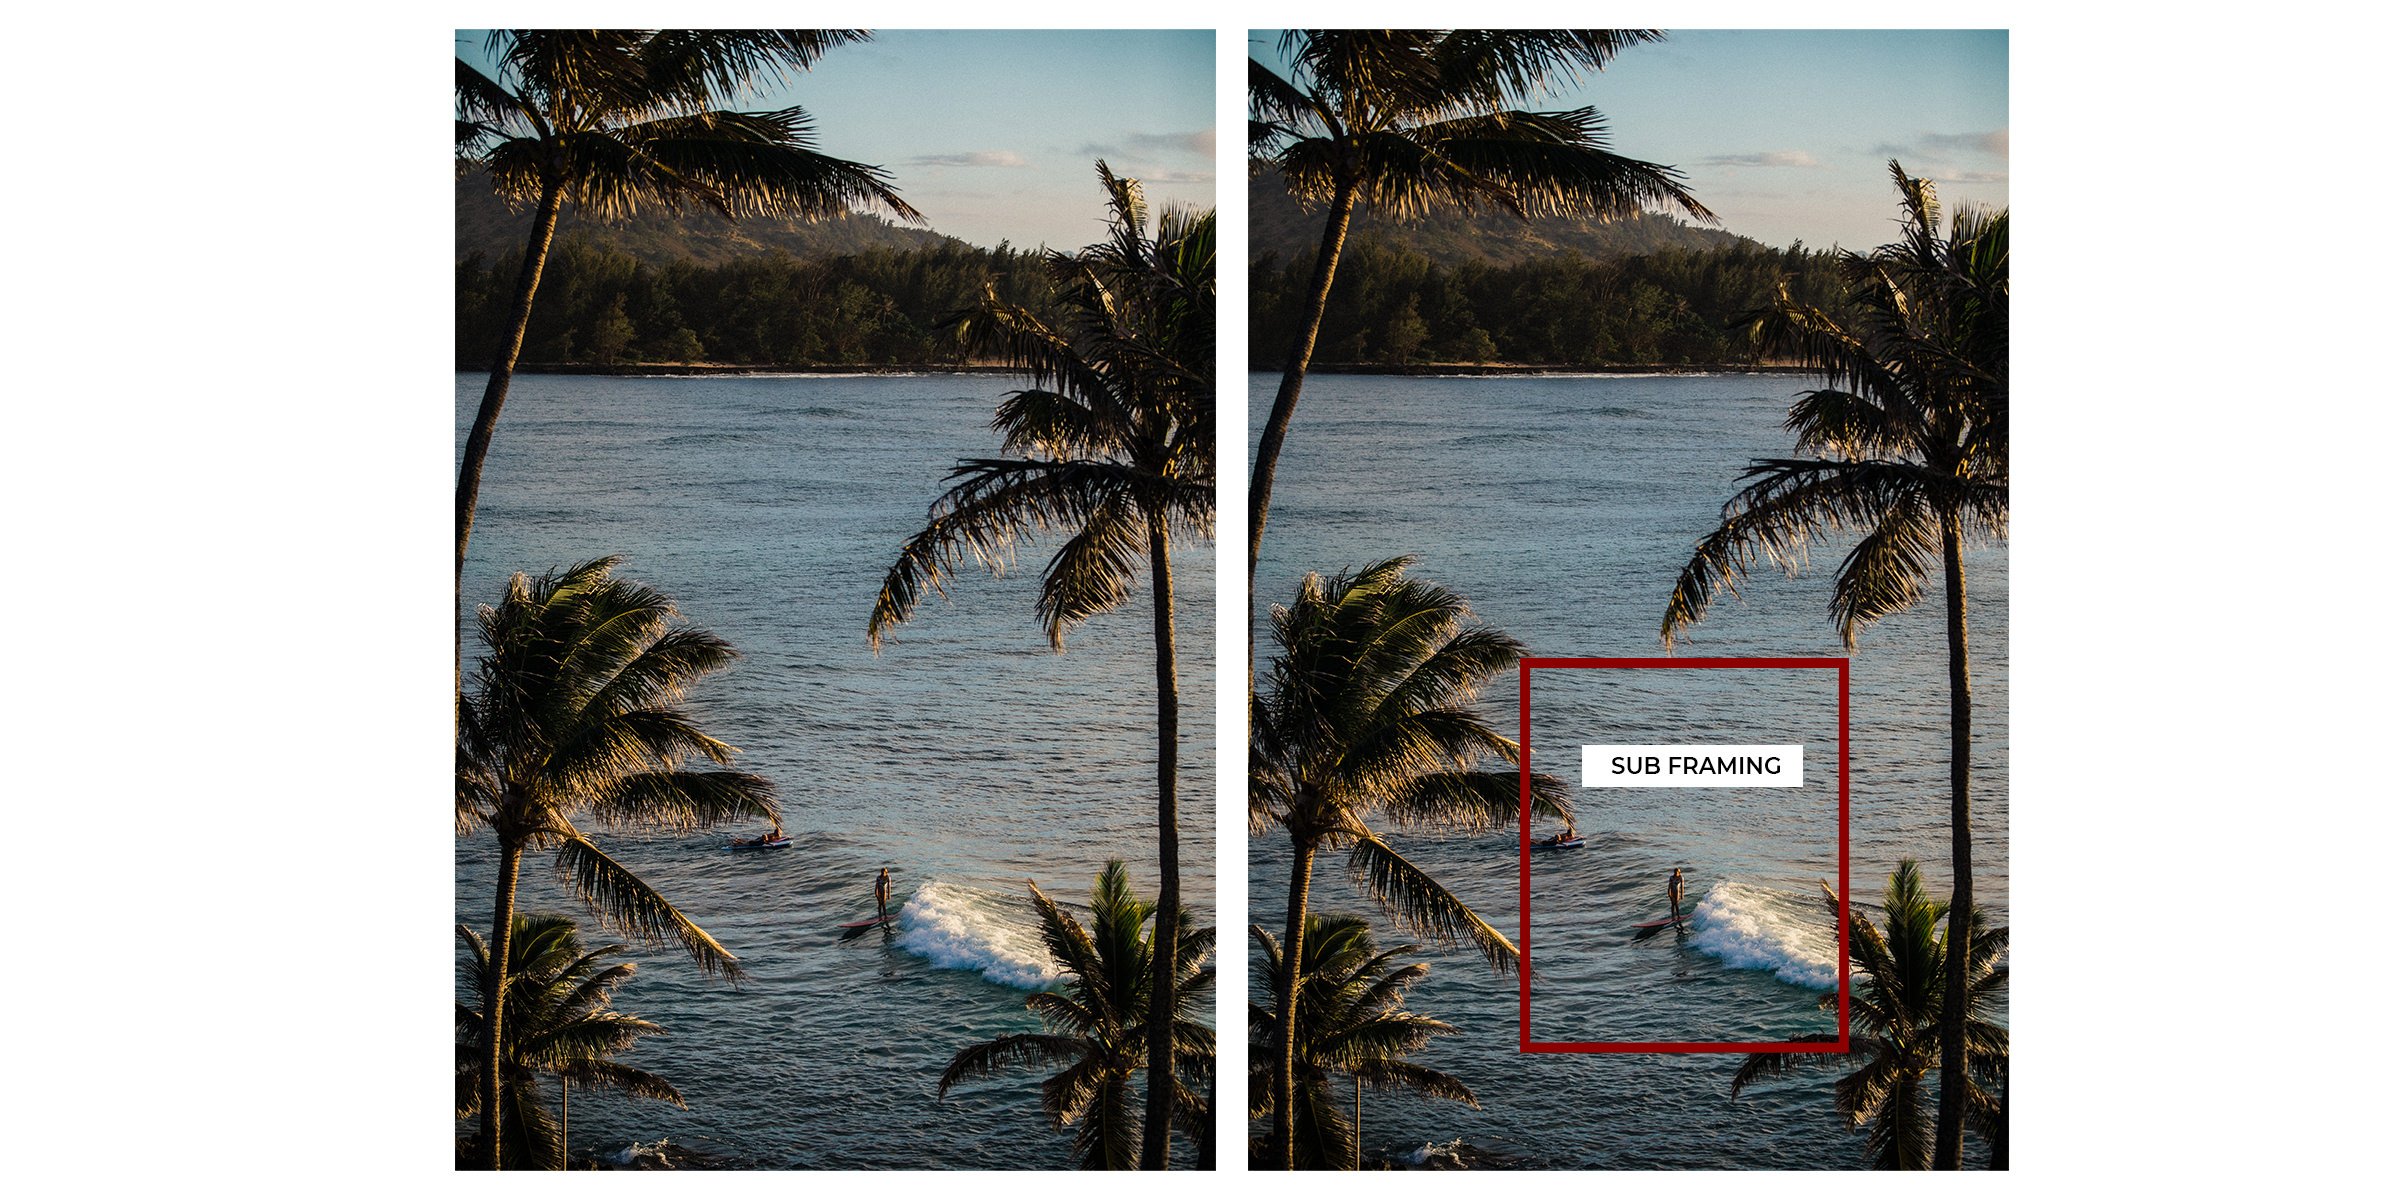
SUB-FRAMING
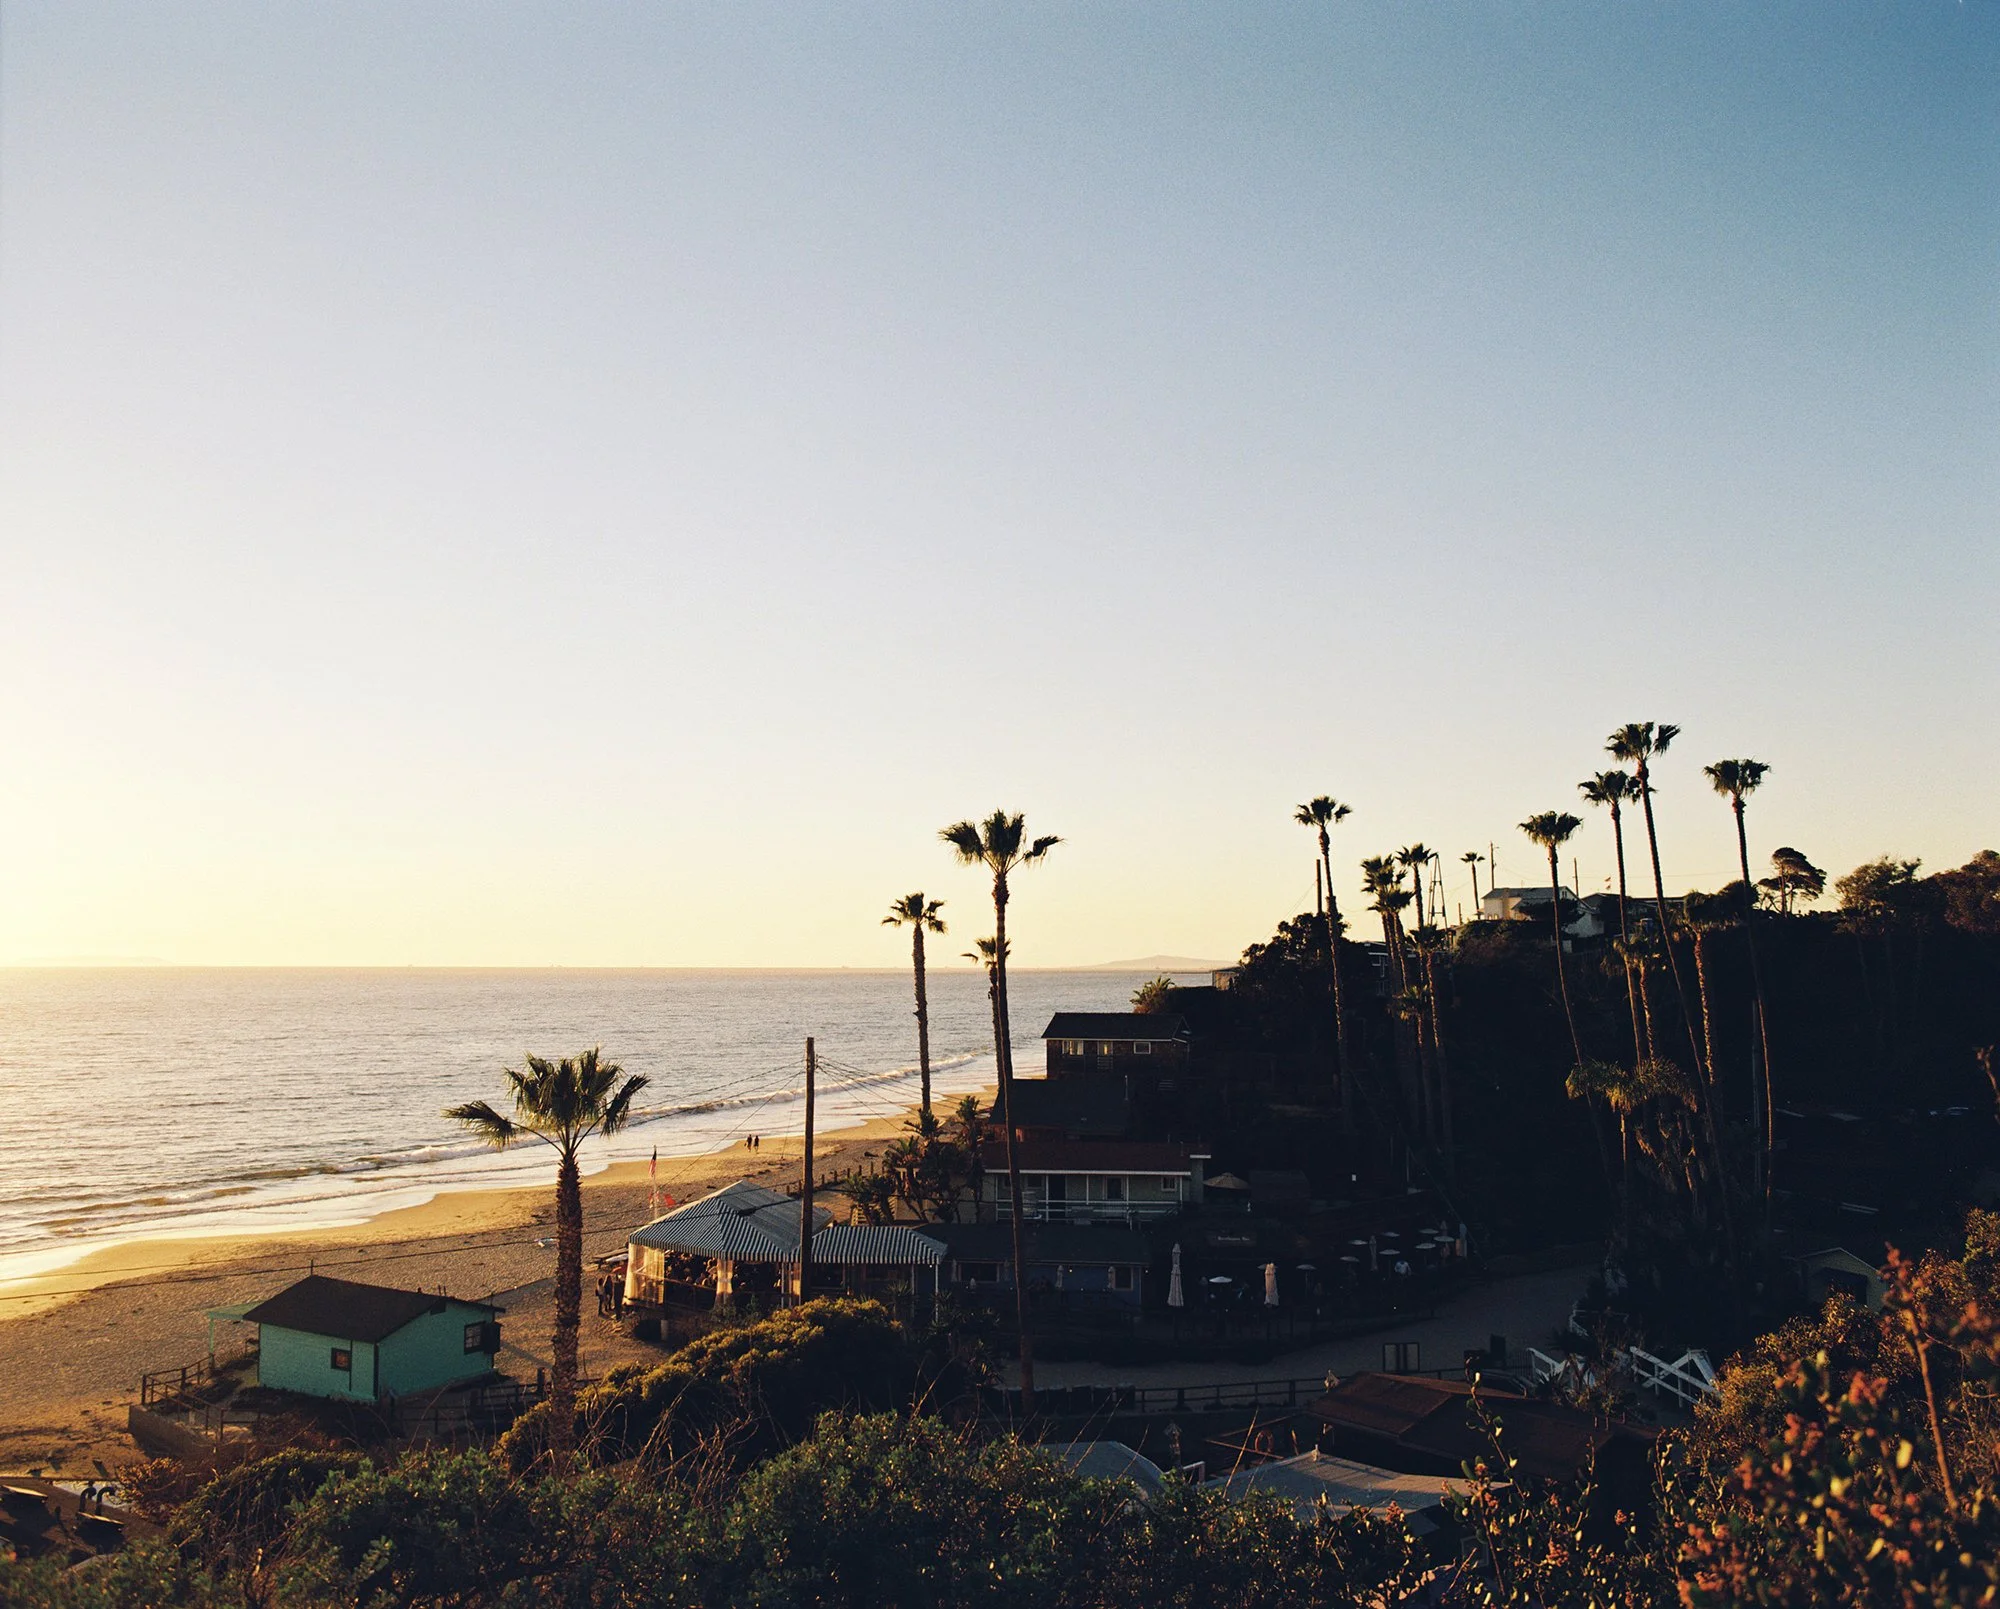
A personal favorite of mine is sub-framing. Typically when I’m focusing on how to photograph a scene, my eye naturally starts to gather things to help frame my subject. In the photo above, I used the palm trees to make a nice frame around the subject. It’s a frame inside a frame. Another example below:
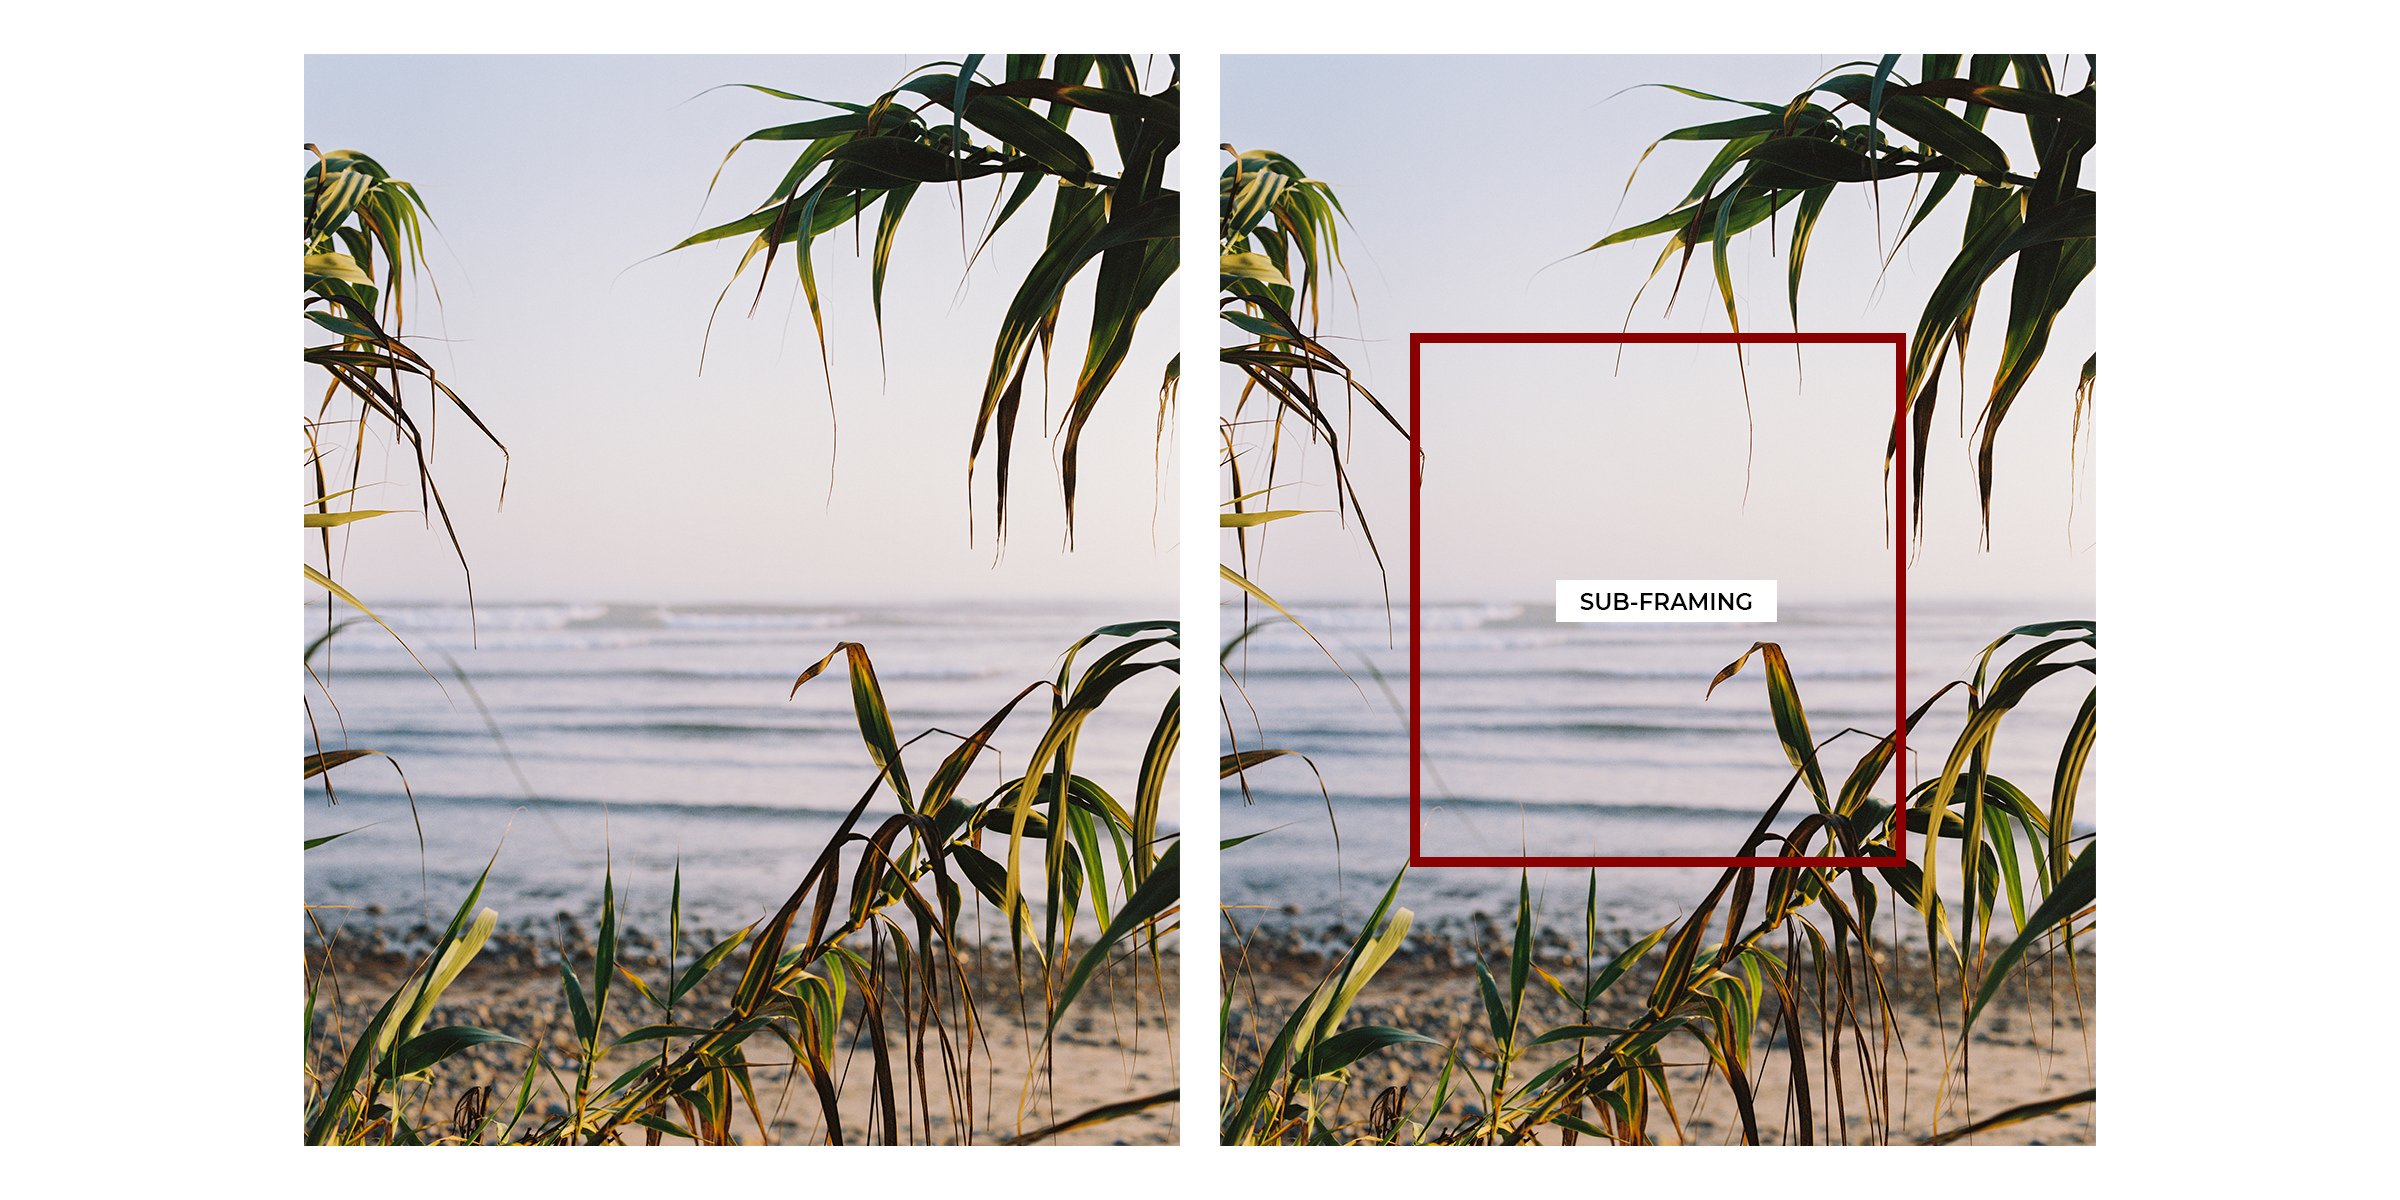
In this scene, I used the palm trees to help frame the ocean. I shot this at a wide aperture (meaning the background gets blurry) to give an ethereal, dreamy feel to the photo. If the waves were really good, It would’ve worked really well to shoot everything in focus with the same composition to highlight the wave.
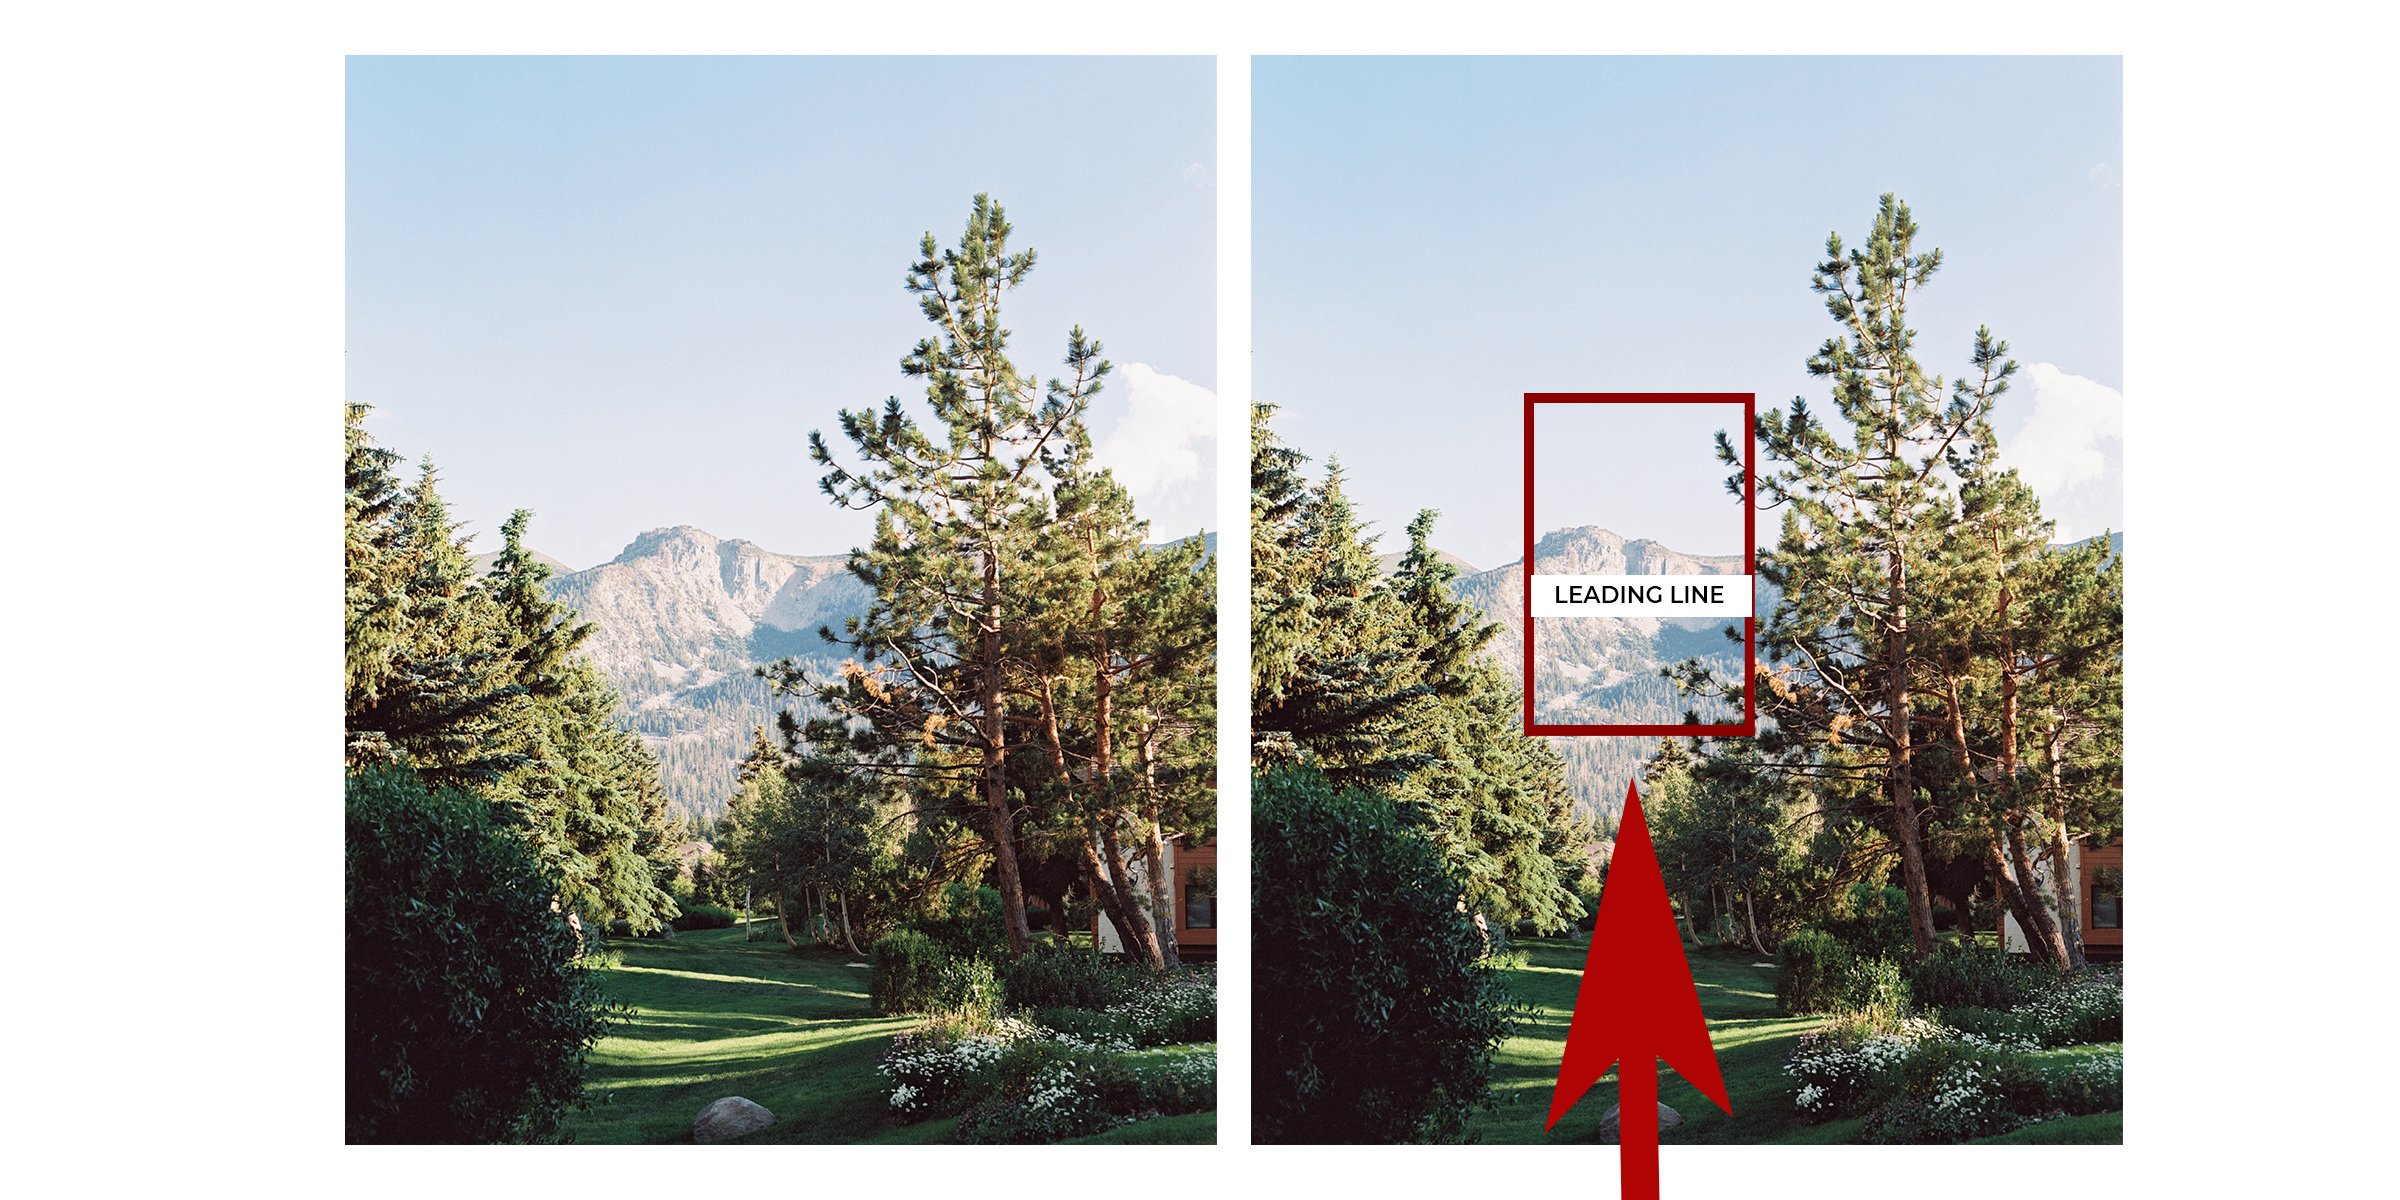
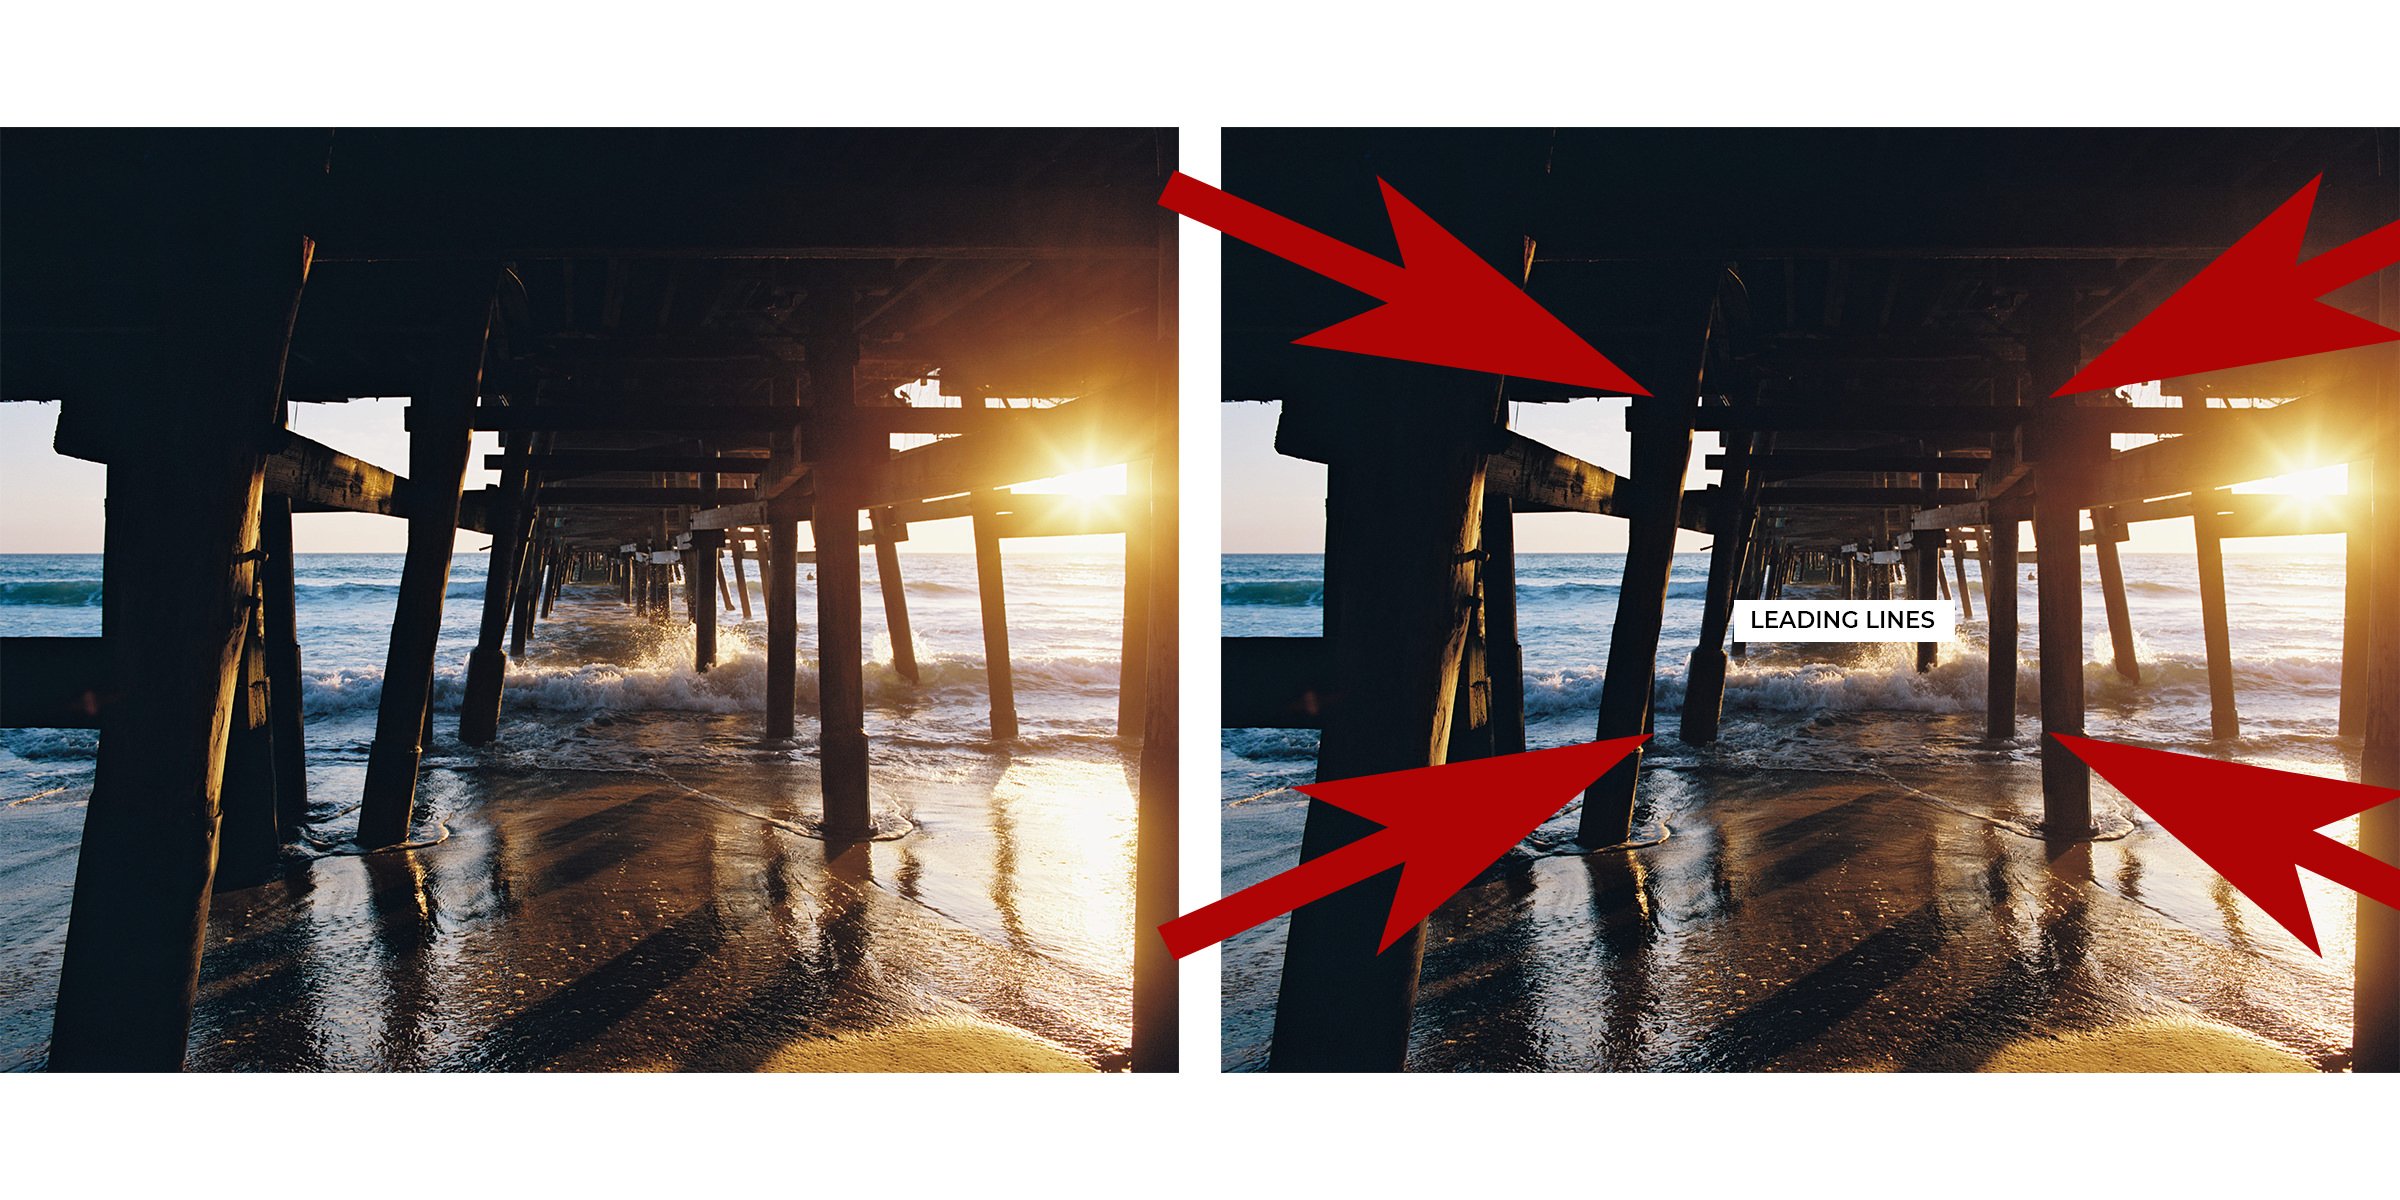
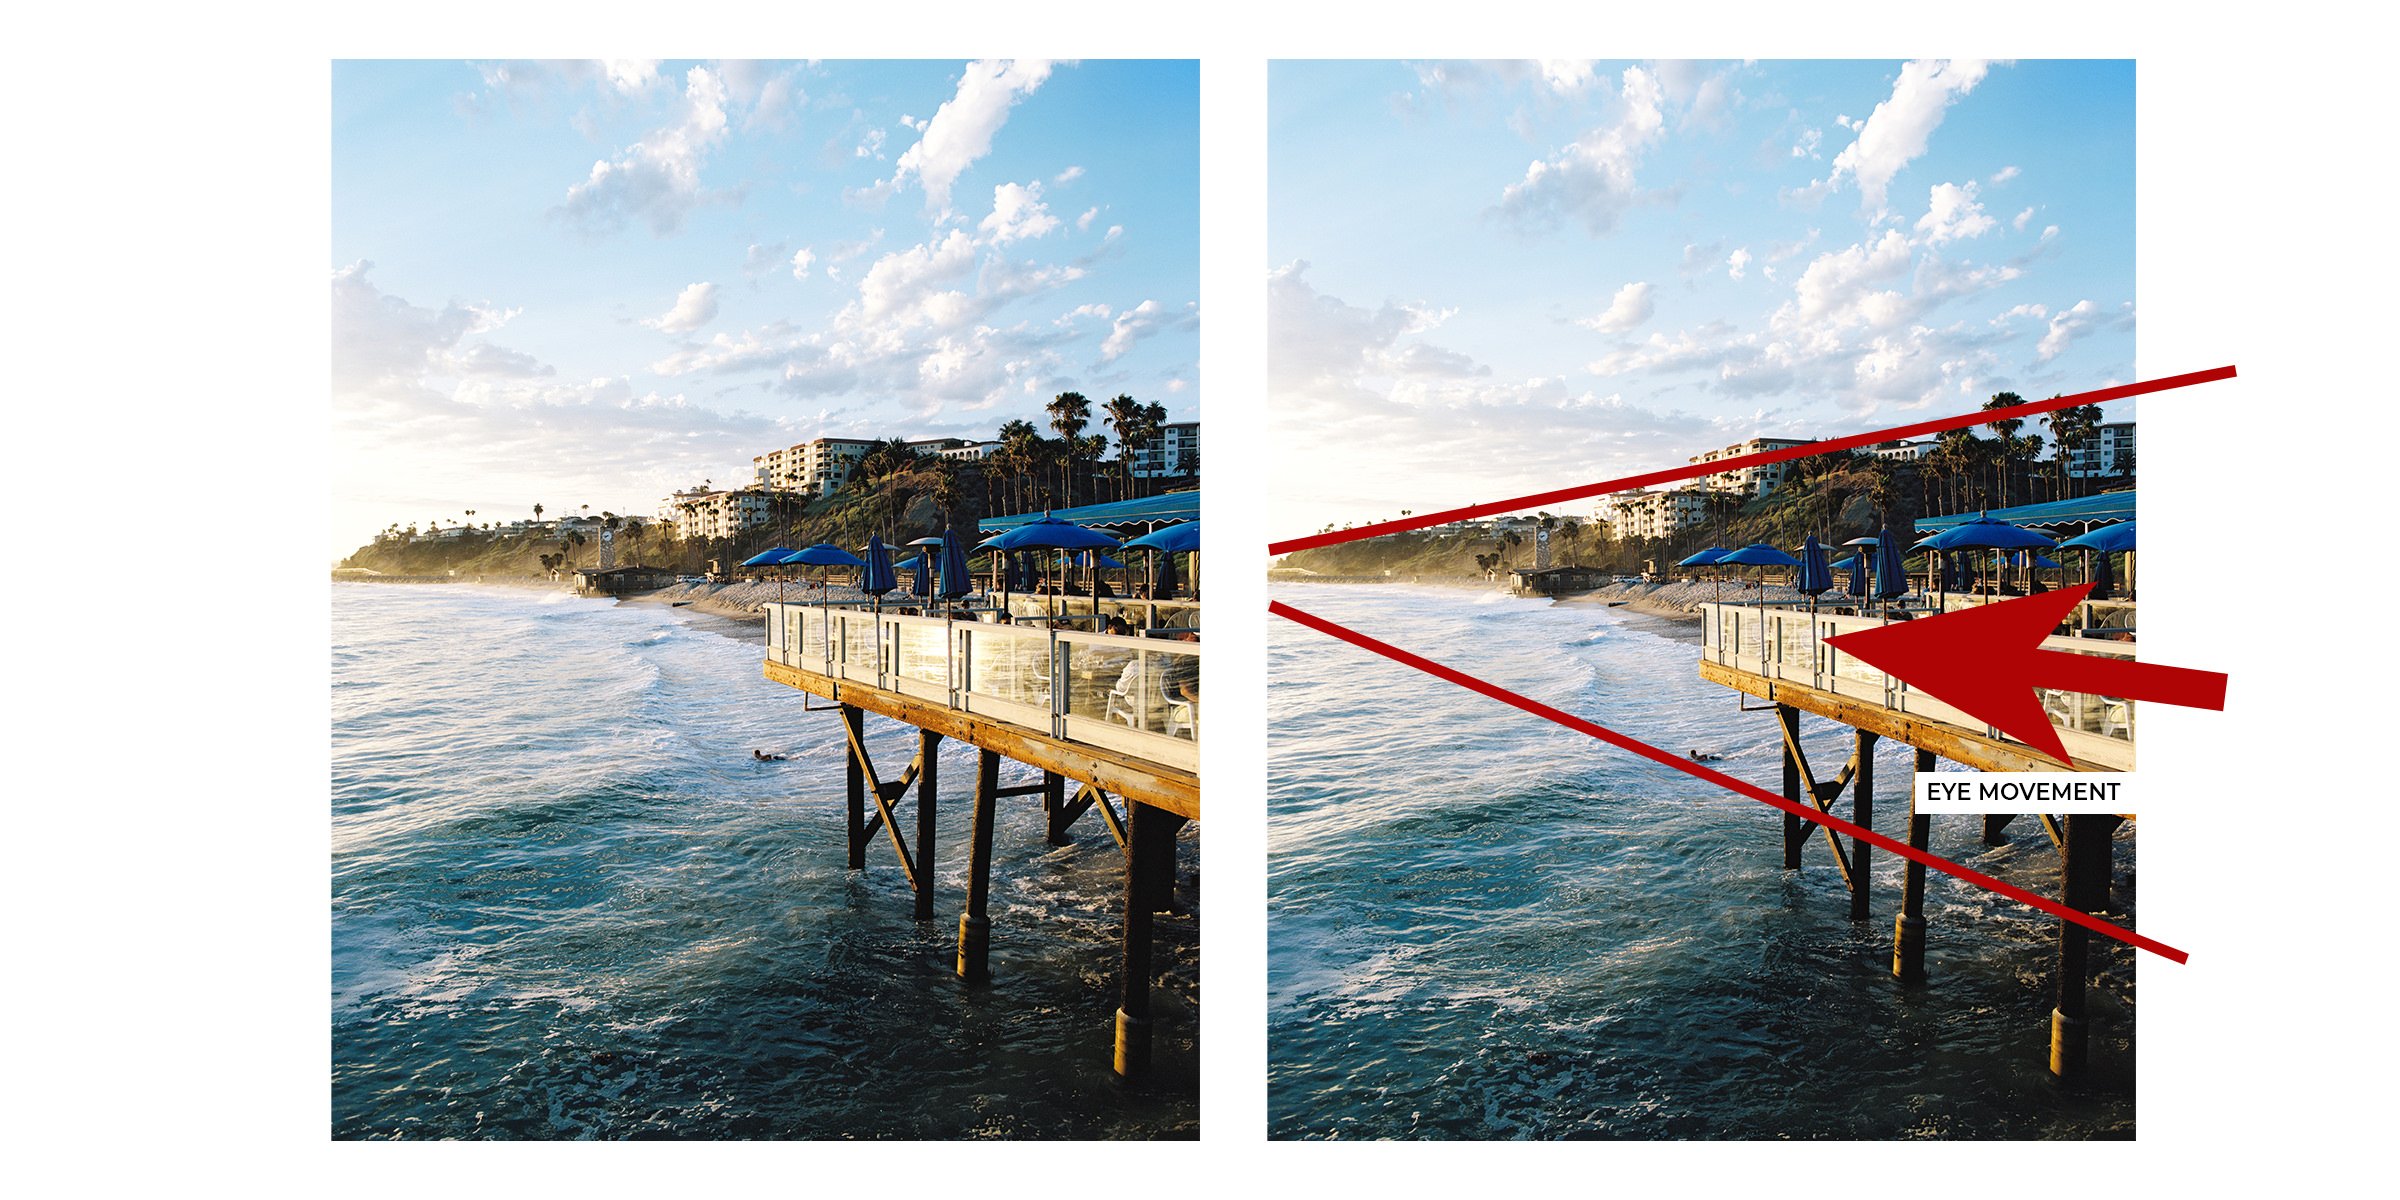
Leading Lines
Another fun compositional trick is leading lines. Naturally when you look at a photo your eye moves around it. This can be through the lines in the photo, or because of contrast and colors, also the use of negative space. Regardless of how you use leading lines, a photo will have a lot more interest if the lines lead your eyes somewhere.

SCALE
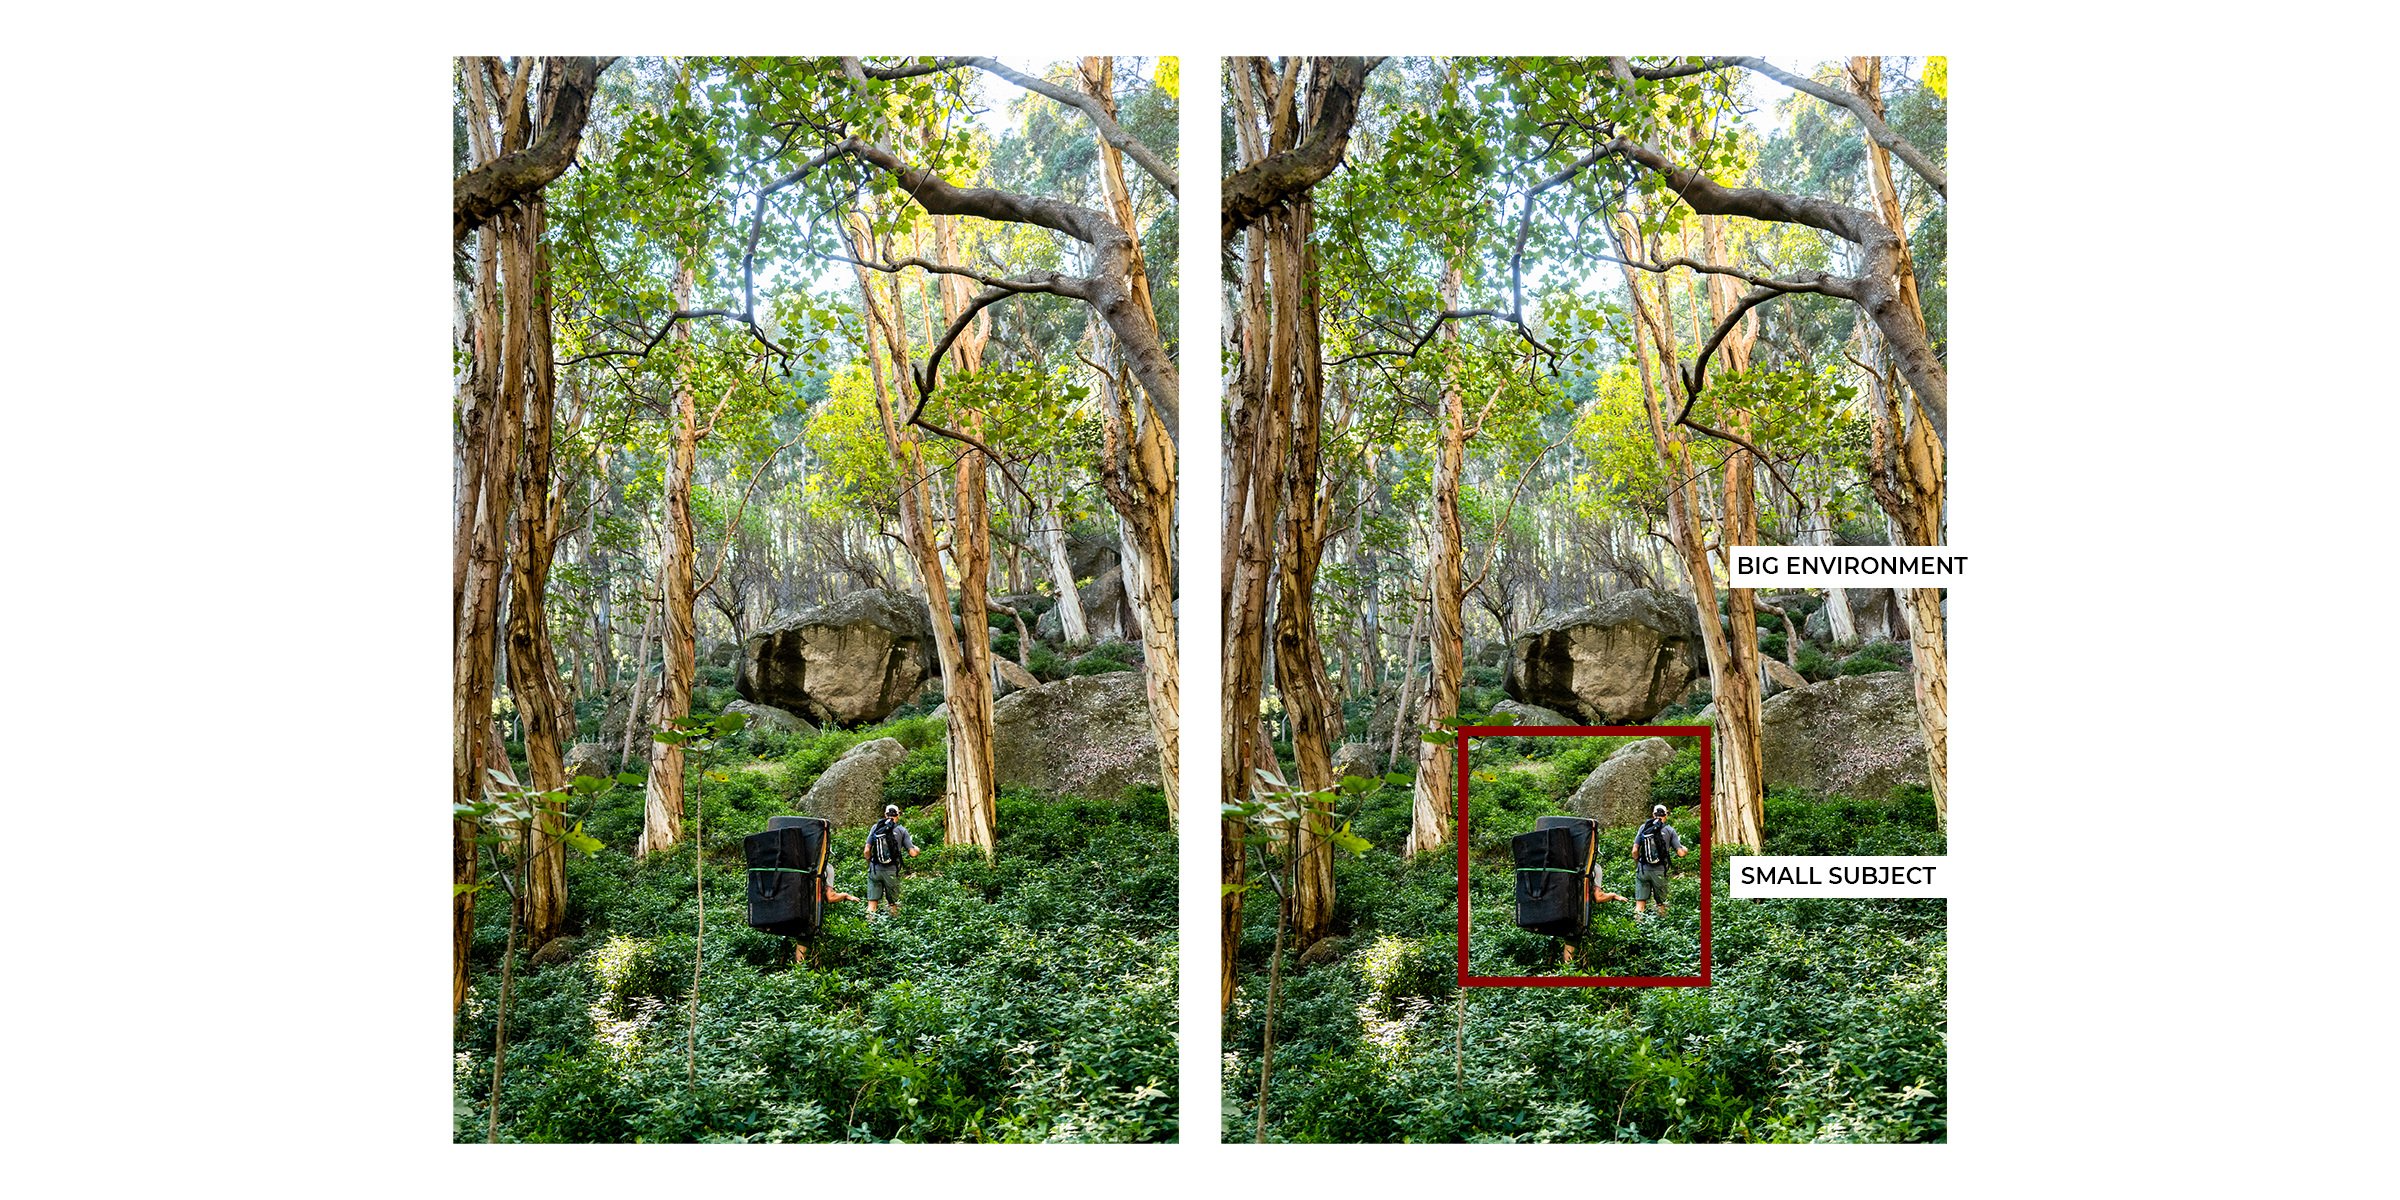
A classic you’ll see on Instagram. Small person in a big world. it shows the beauty of the landscape and scale of the scene.
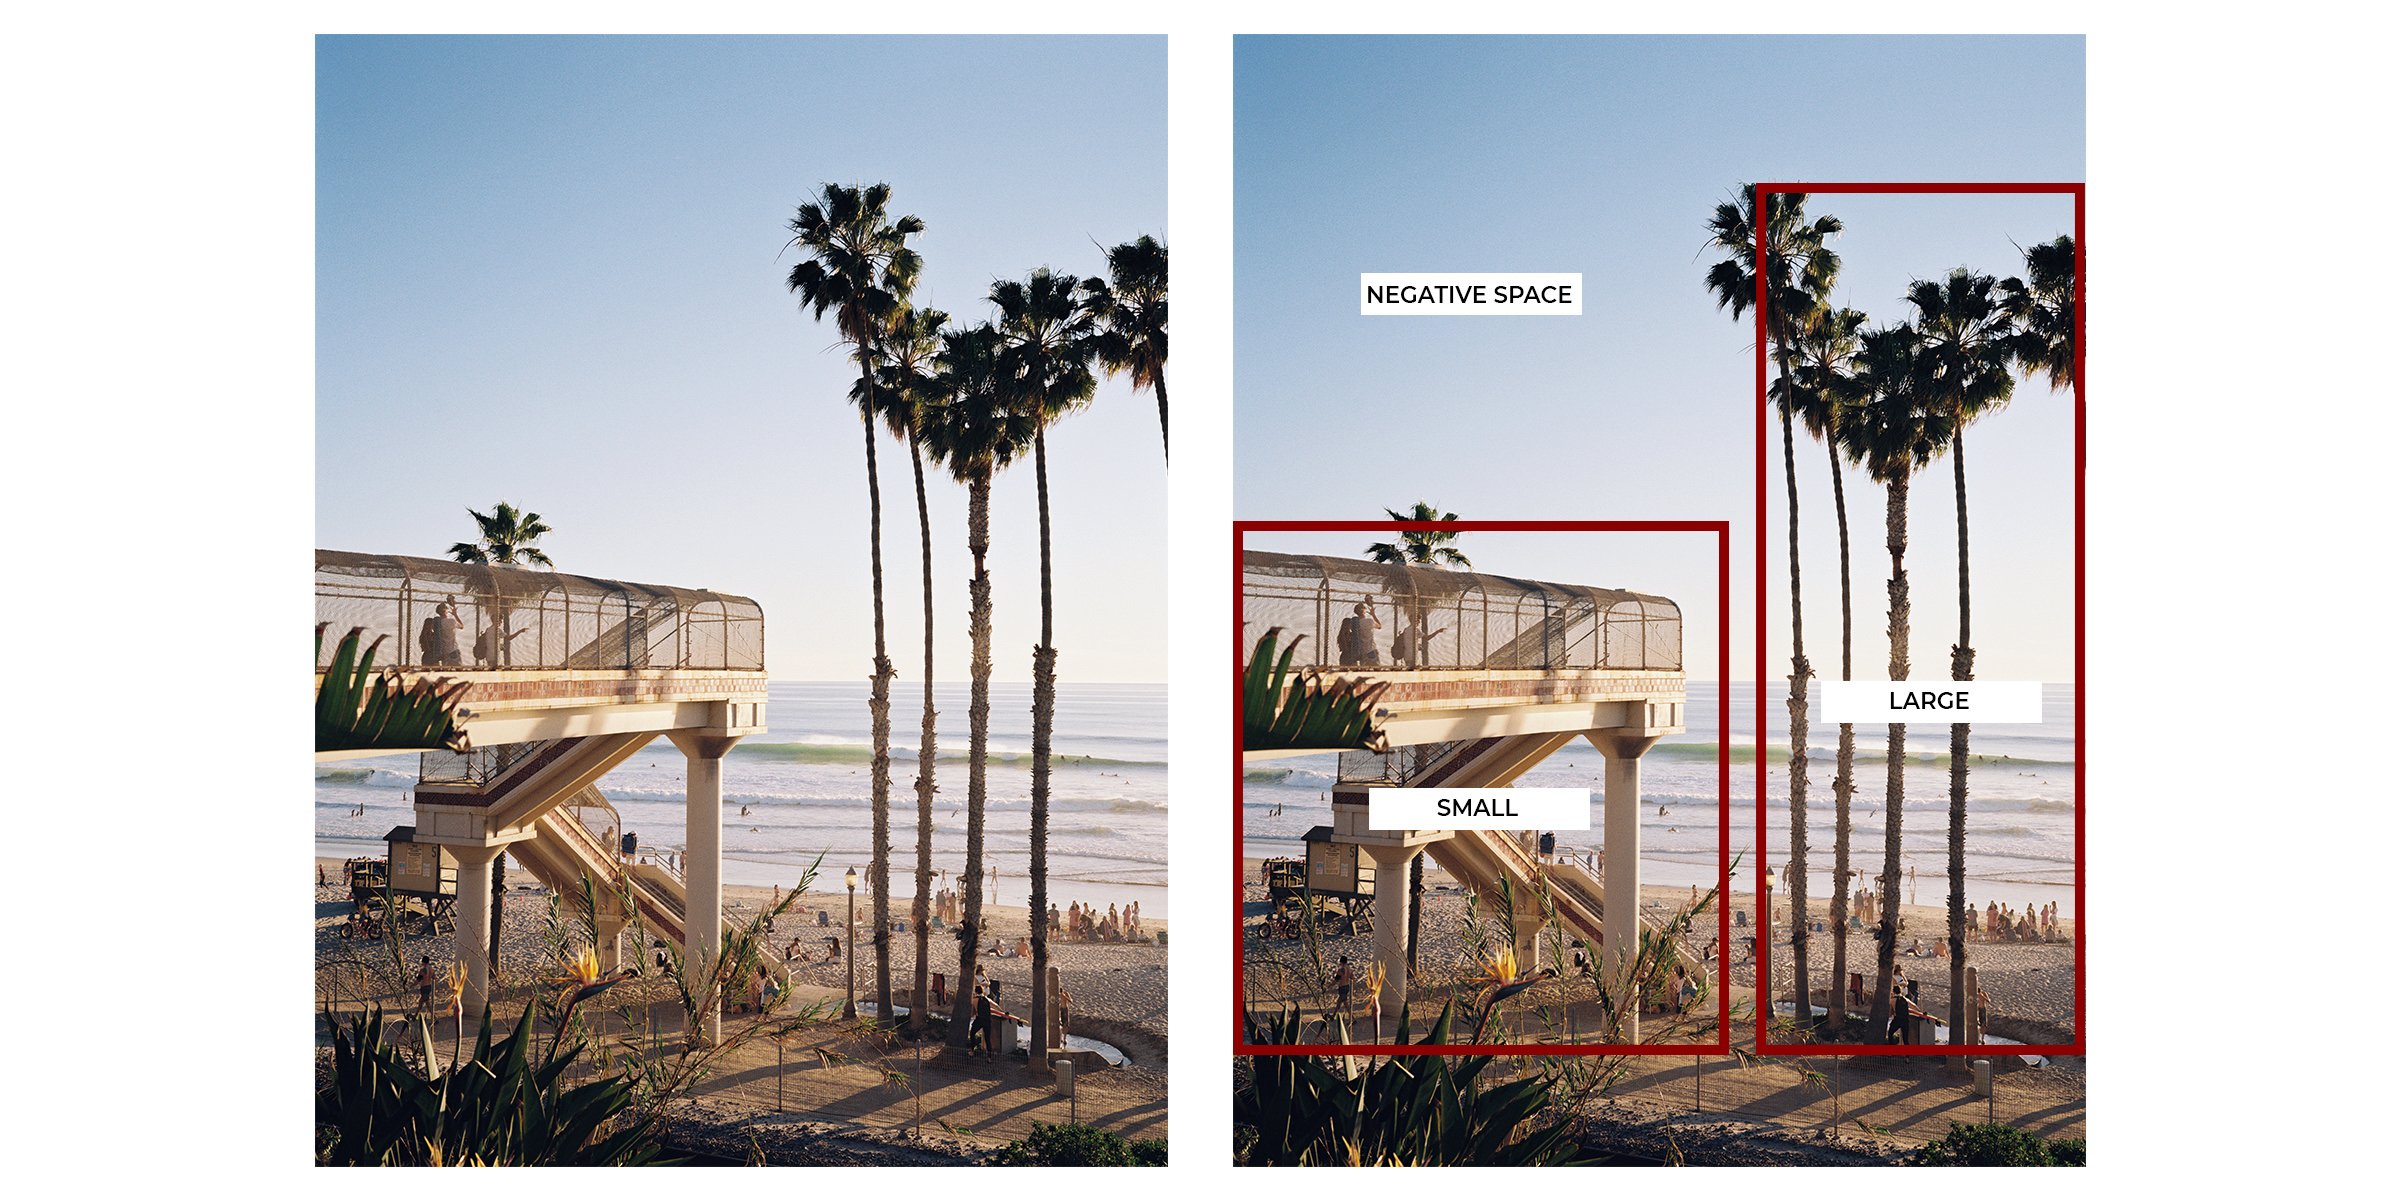
Juxtaposing smaller subjects with bigger ones, as well as creating different shapes and leading lines in the photo can make for an interesting composition. The bridge and stairwell allow a nice flow for your eyes and the negative space allows your eyes to focus on the smaller details.
BONUS TIP
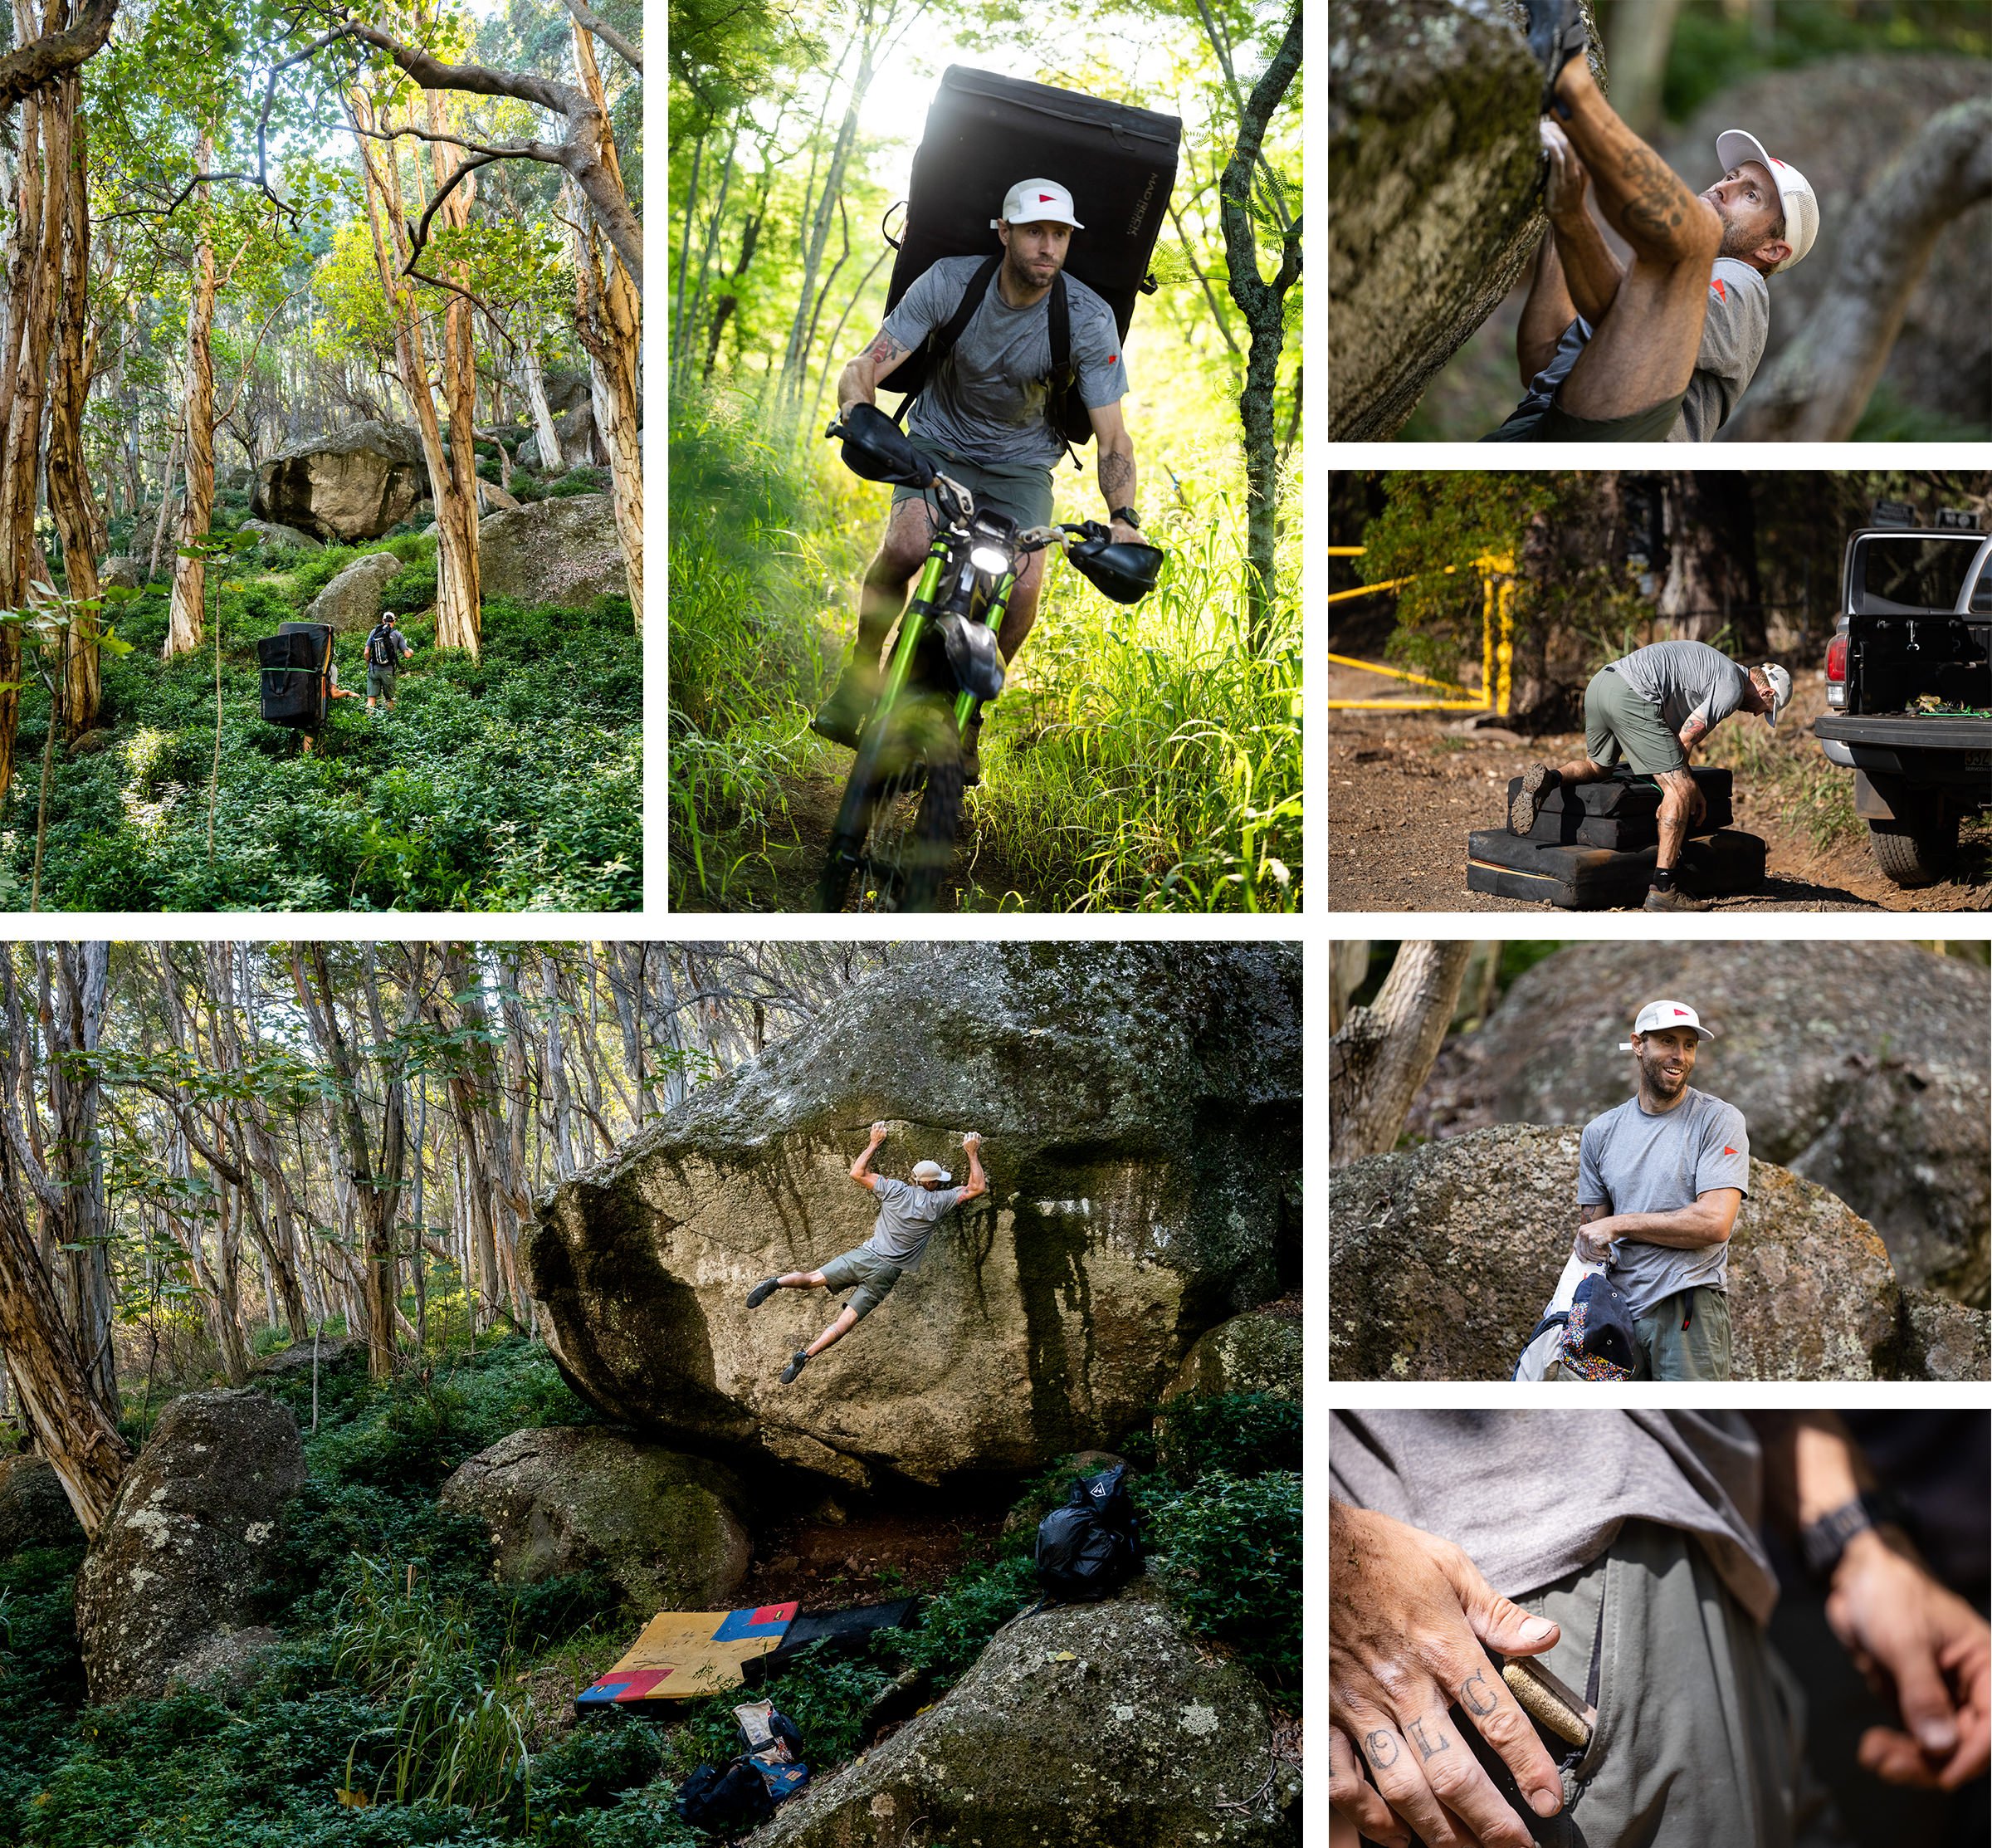
Okay, you made it this far. Here’s the number one most important bonus tip: Shoot your subject at different distances. If your subject is a person. Shoot them far away (small person, big environment), full body (showing their feet all the way to their head), portrait (shoulders up) and a detail, close up on something of interest. Treat a lot of your scenes like this and you’ll create a very interesting gallery rather than the same size subject in every photo.
This is where having more than one lens can come in handy. If you have multiple lenses, use them to add variety to your photos. If you don’t have more than one lens, you just need to move your feet and get closer or further from your subject. Just make sure to add some variety.
MORE FREE EDUCATION


A visual breakdown of lighting & composition to help you take better photos.